One of the tasks from school this week was for the kids to make a Mayan mask so I thought this might make a good blog post. We had lots of fun looking at images with the help of Google and I really believe that the way to nail this activity is all in the design. We also split the activity over two days. A day for designing and a day for making the mask.
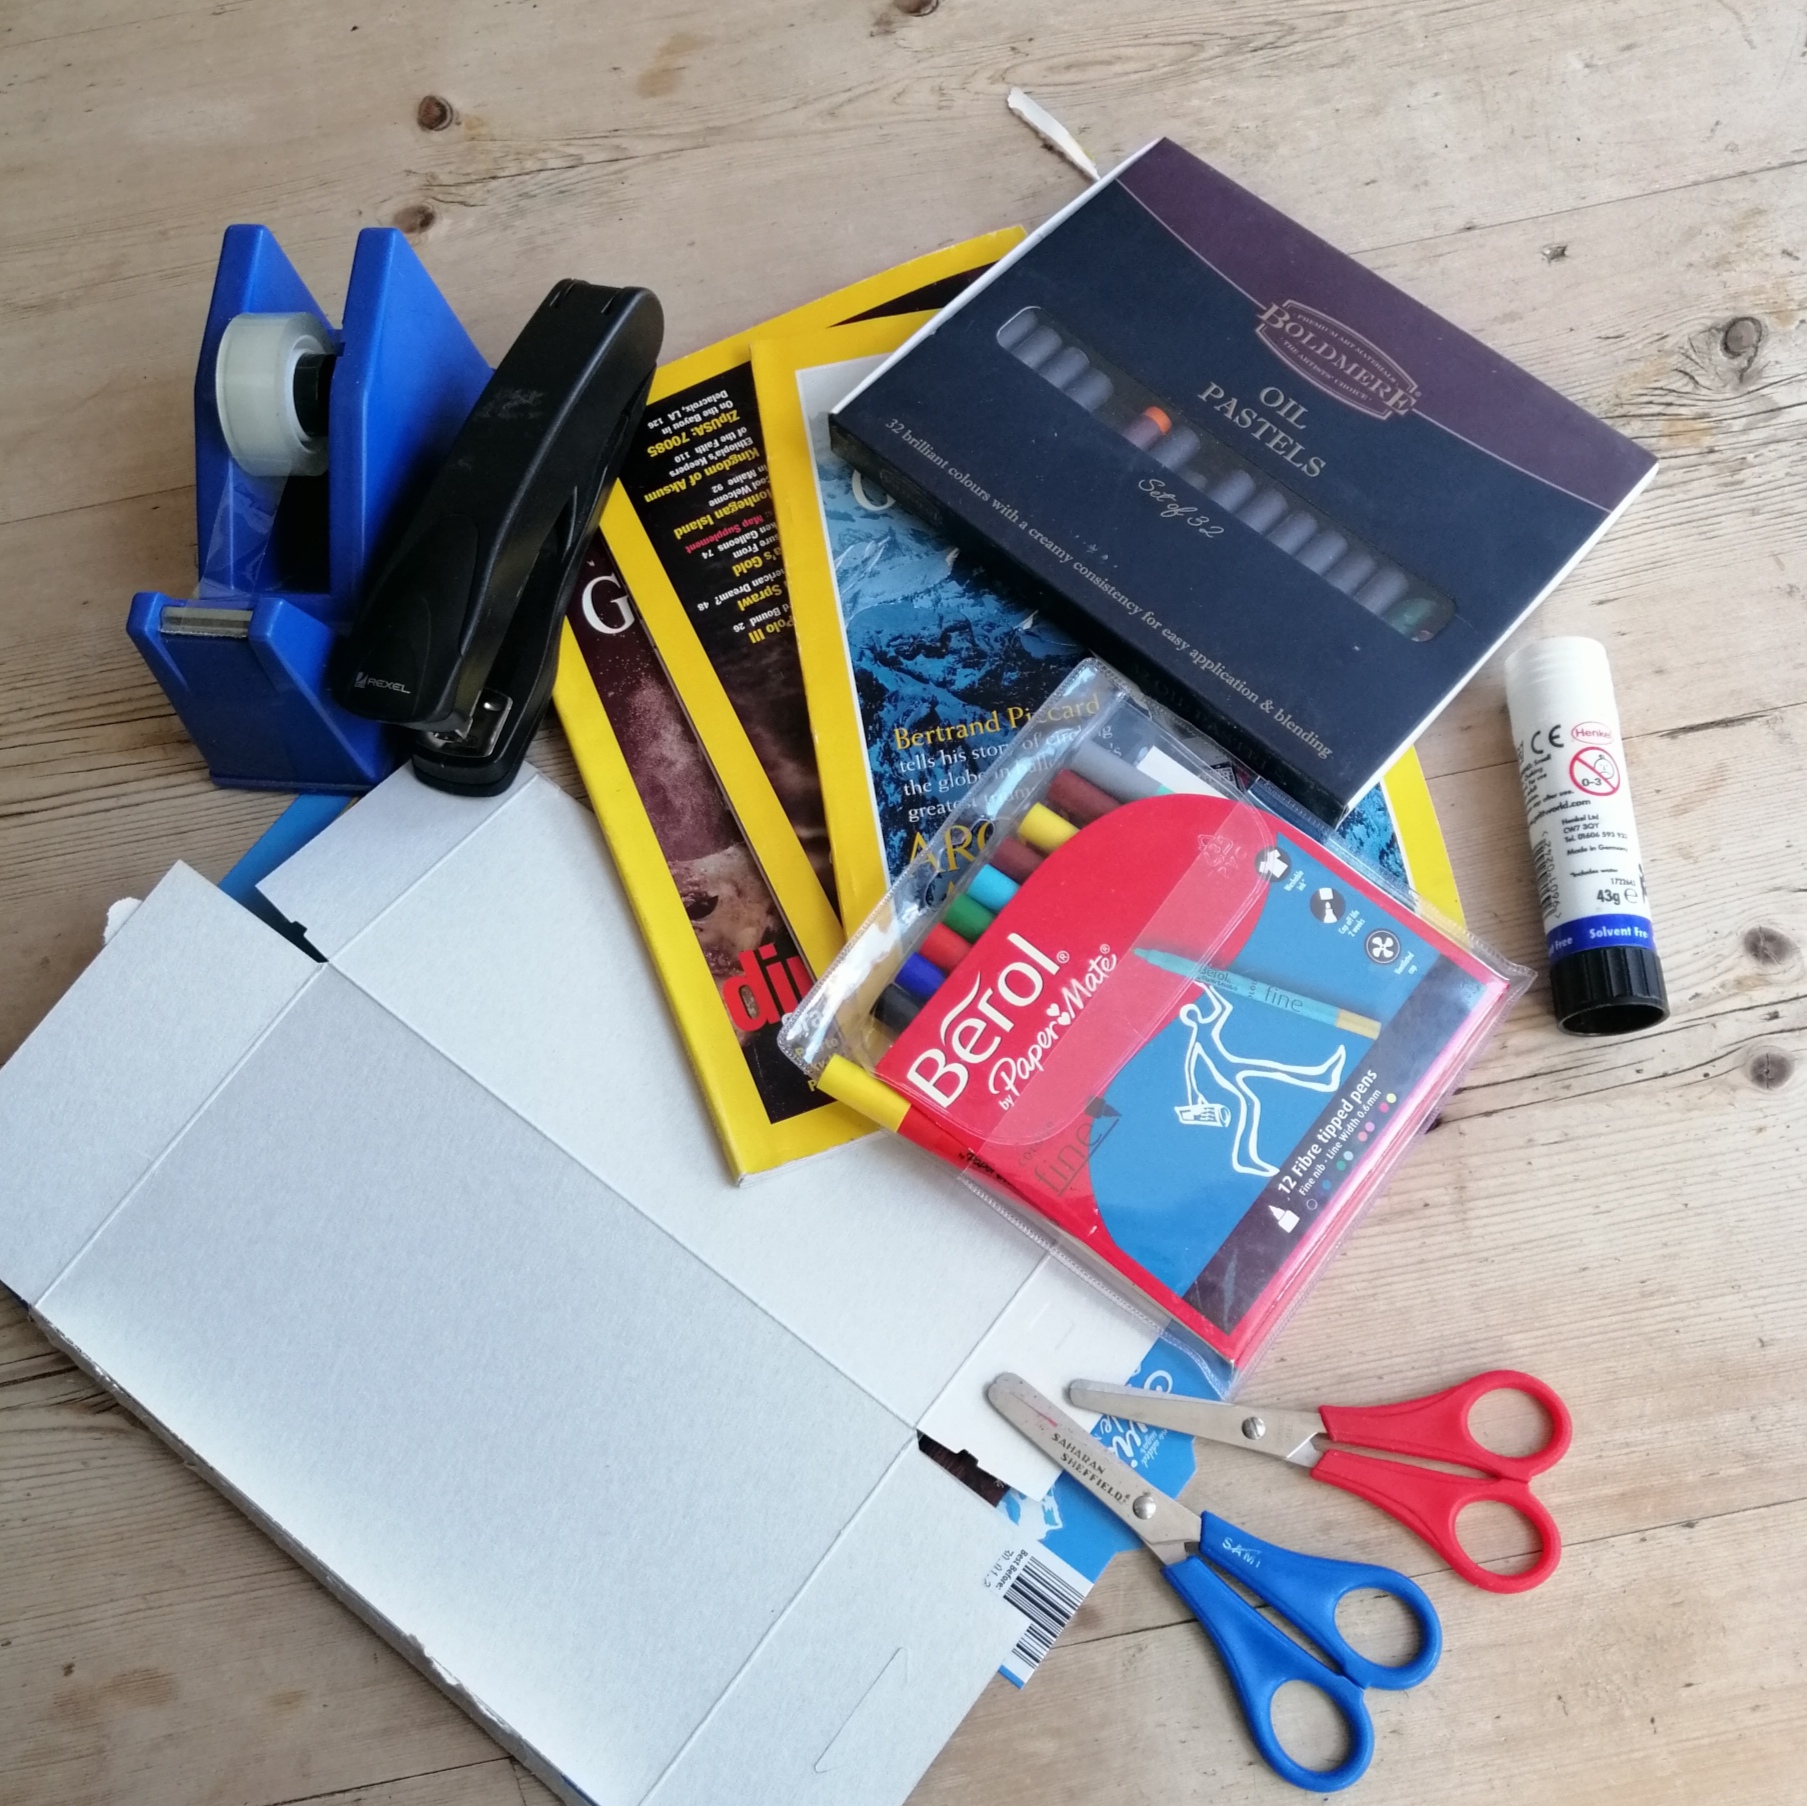
You Will Need:
- Paper and card (cereal box is great card use)
- Pencil and coloured pens, pencils, chalks, oil pastels
- Tape and stick glue (a stapler is very handy but not essential)
- Scissors
- old magazines (optional, but make fun mosaic patterns)
- Imagination and patience!
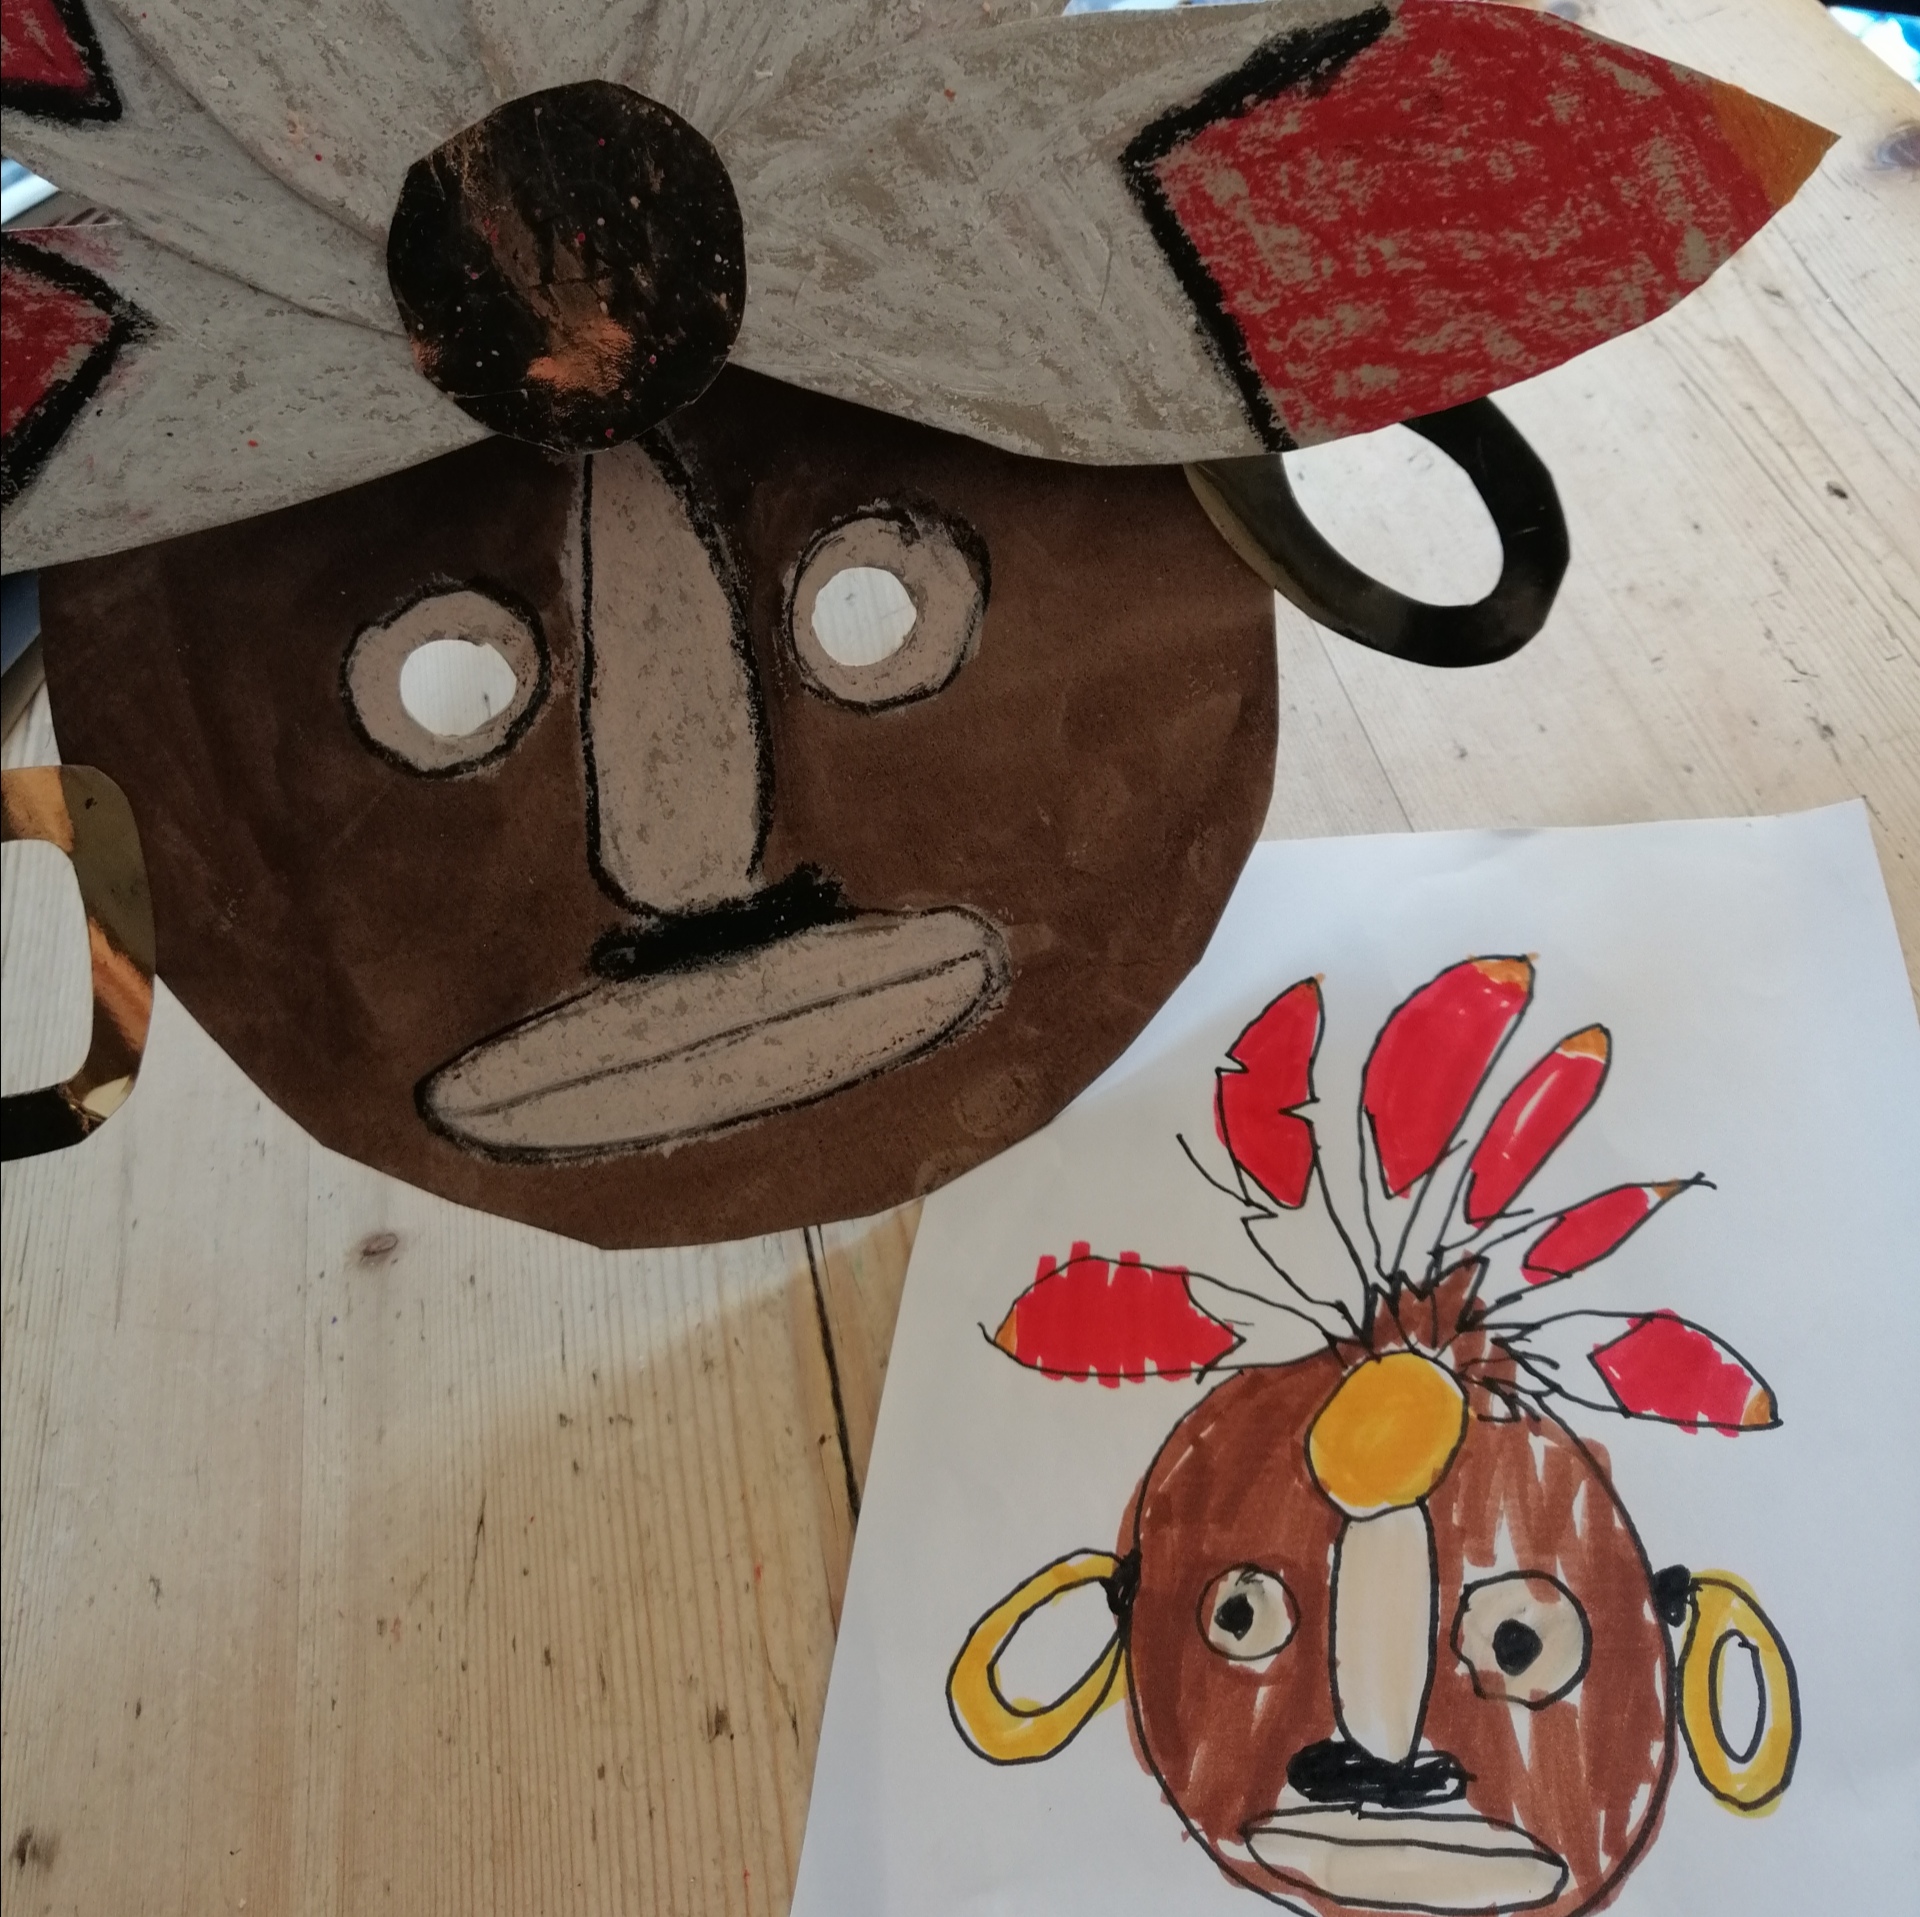
Start by having a good look at Mayan masks online and look at things like colour and shape. Some of them have animal shapes in them and use small mosiac tiles.
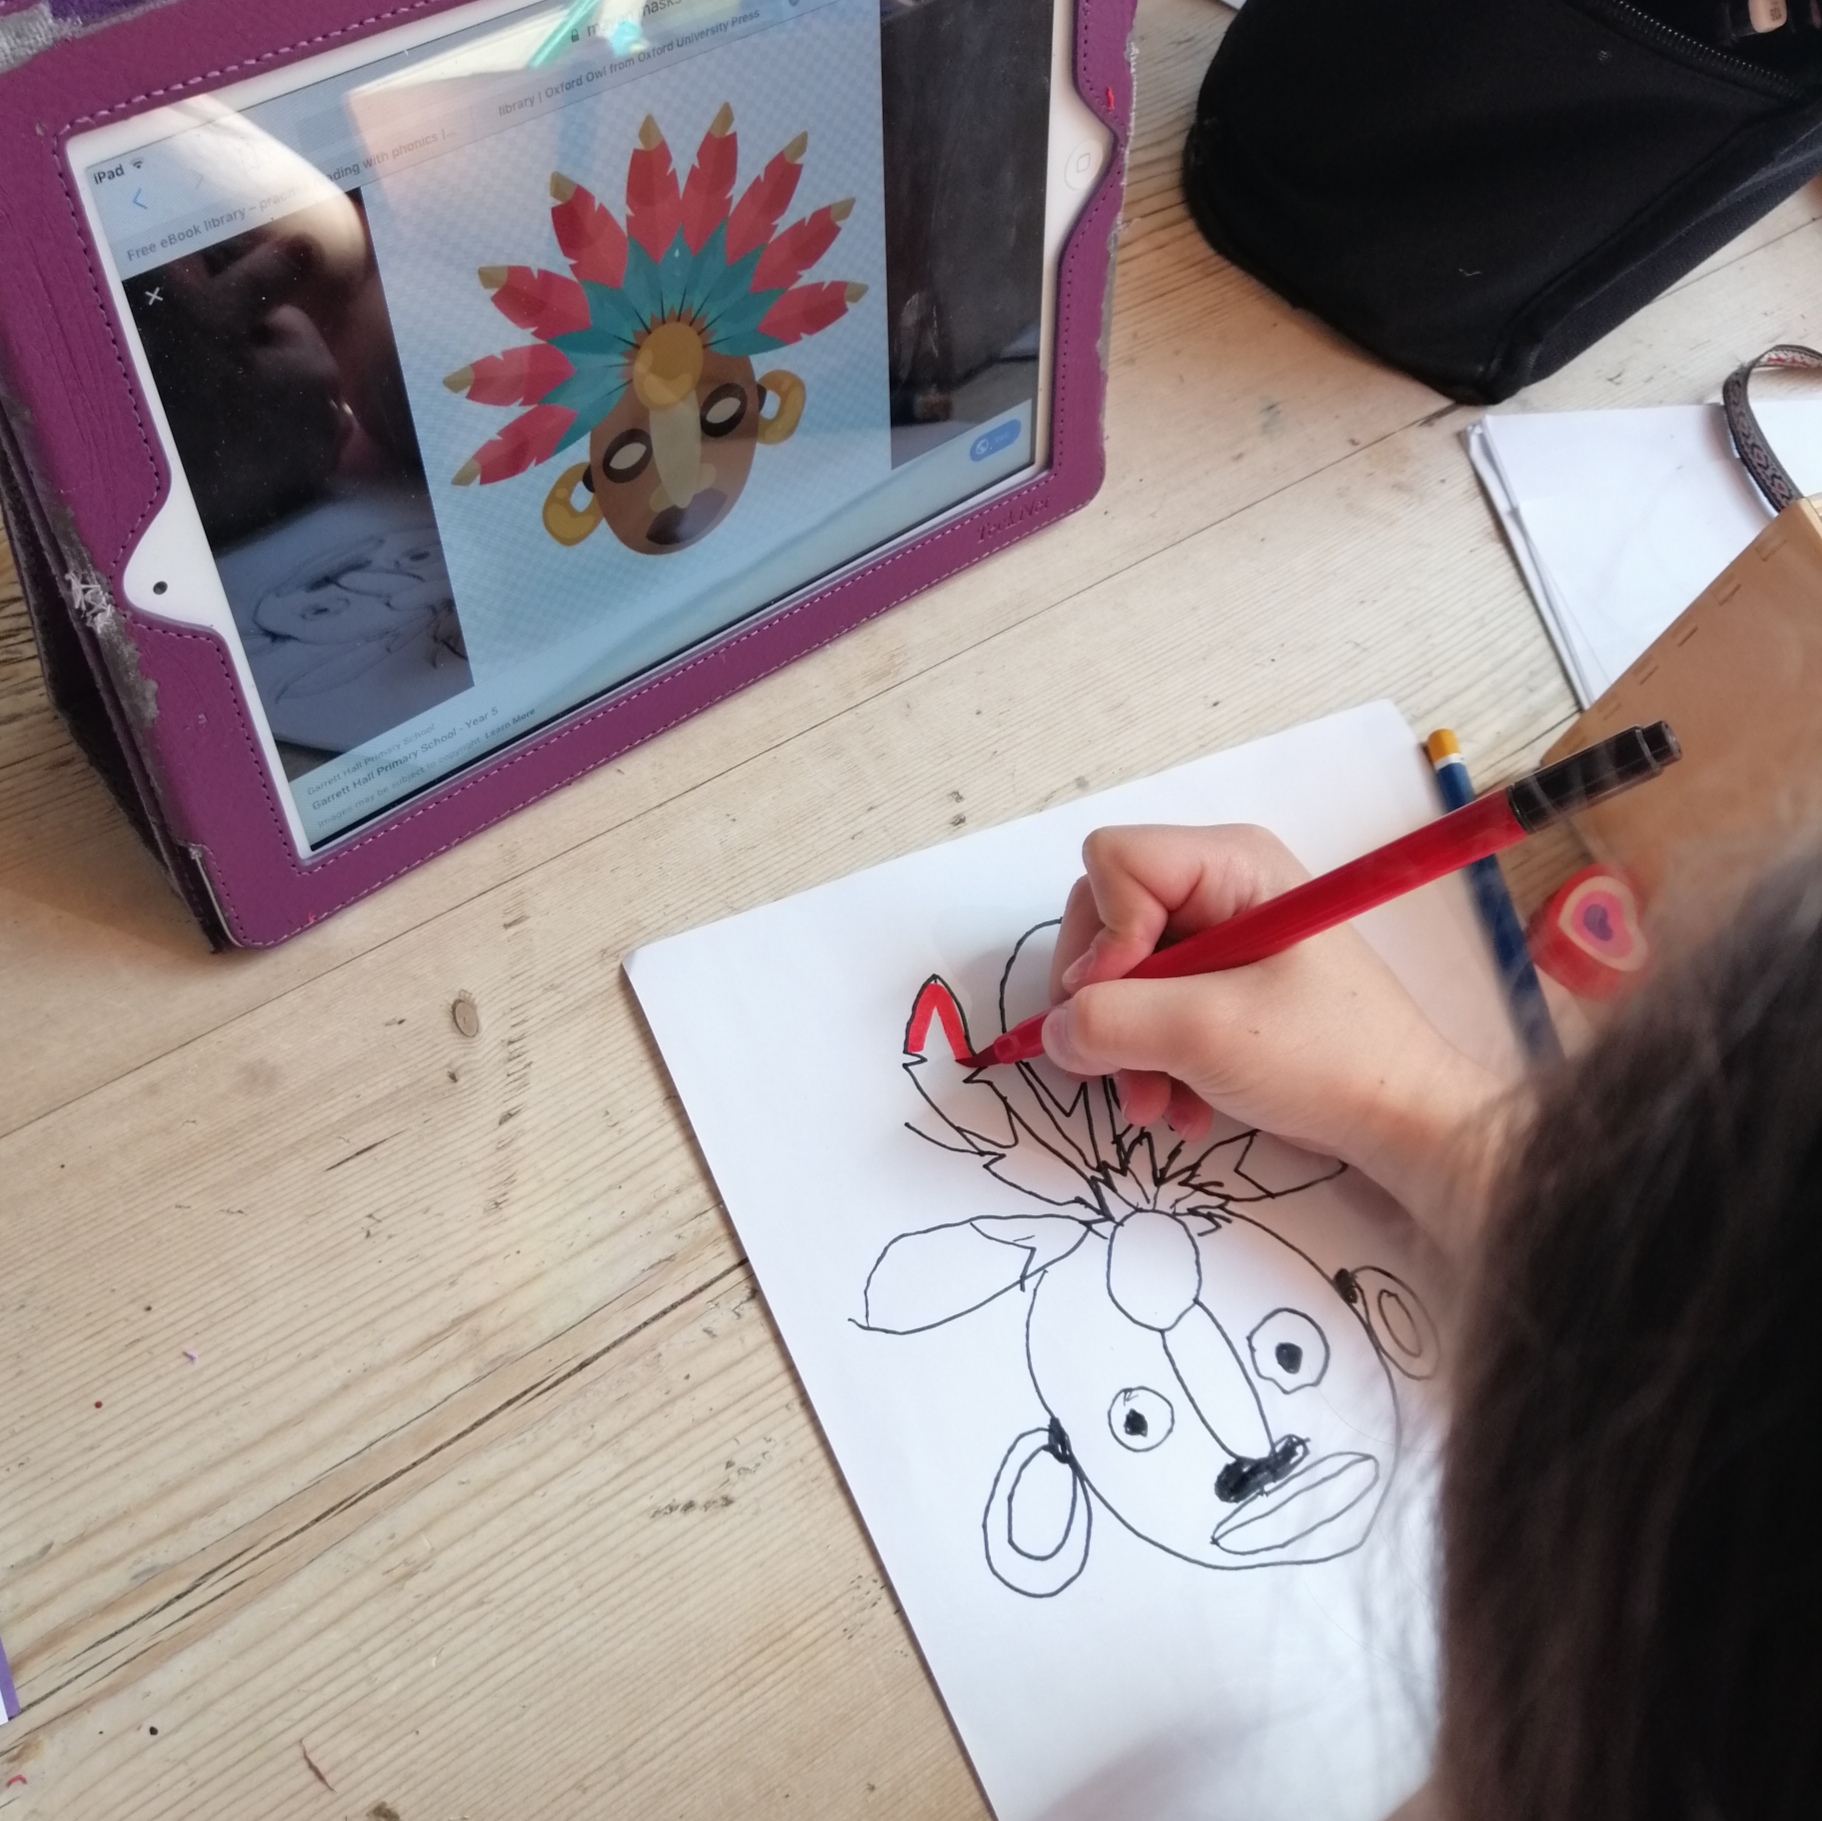
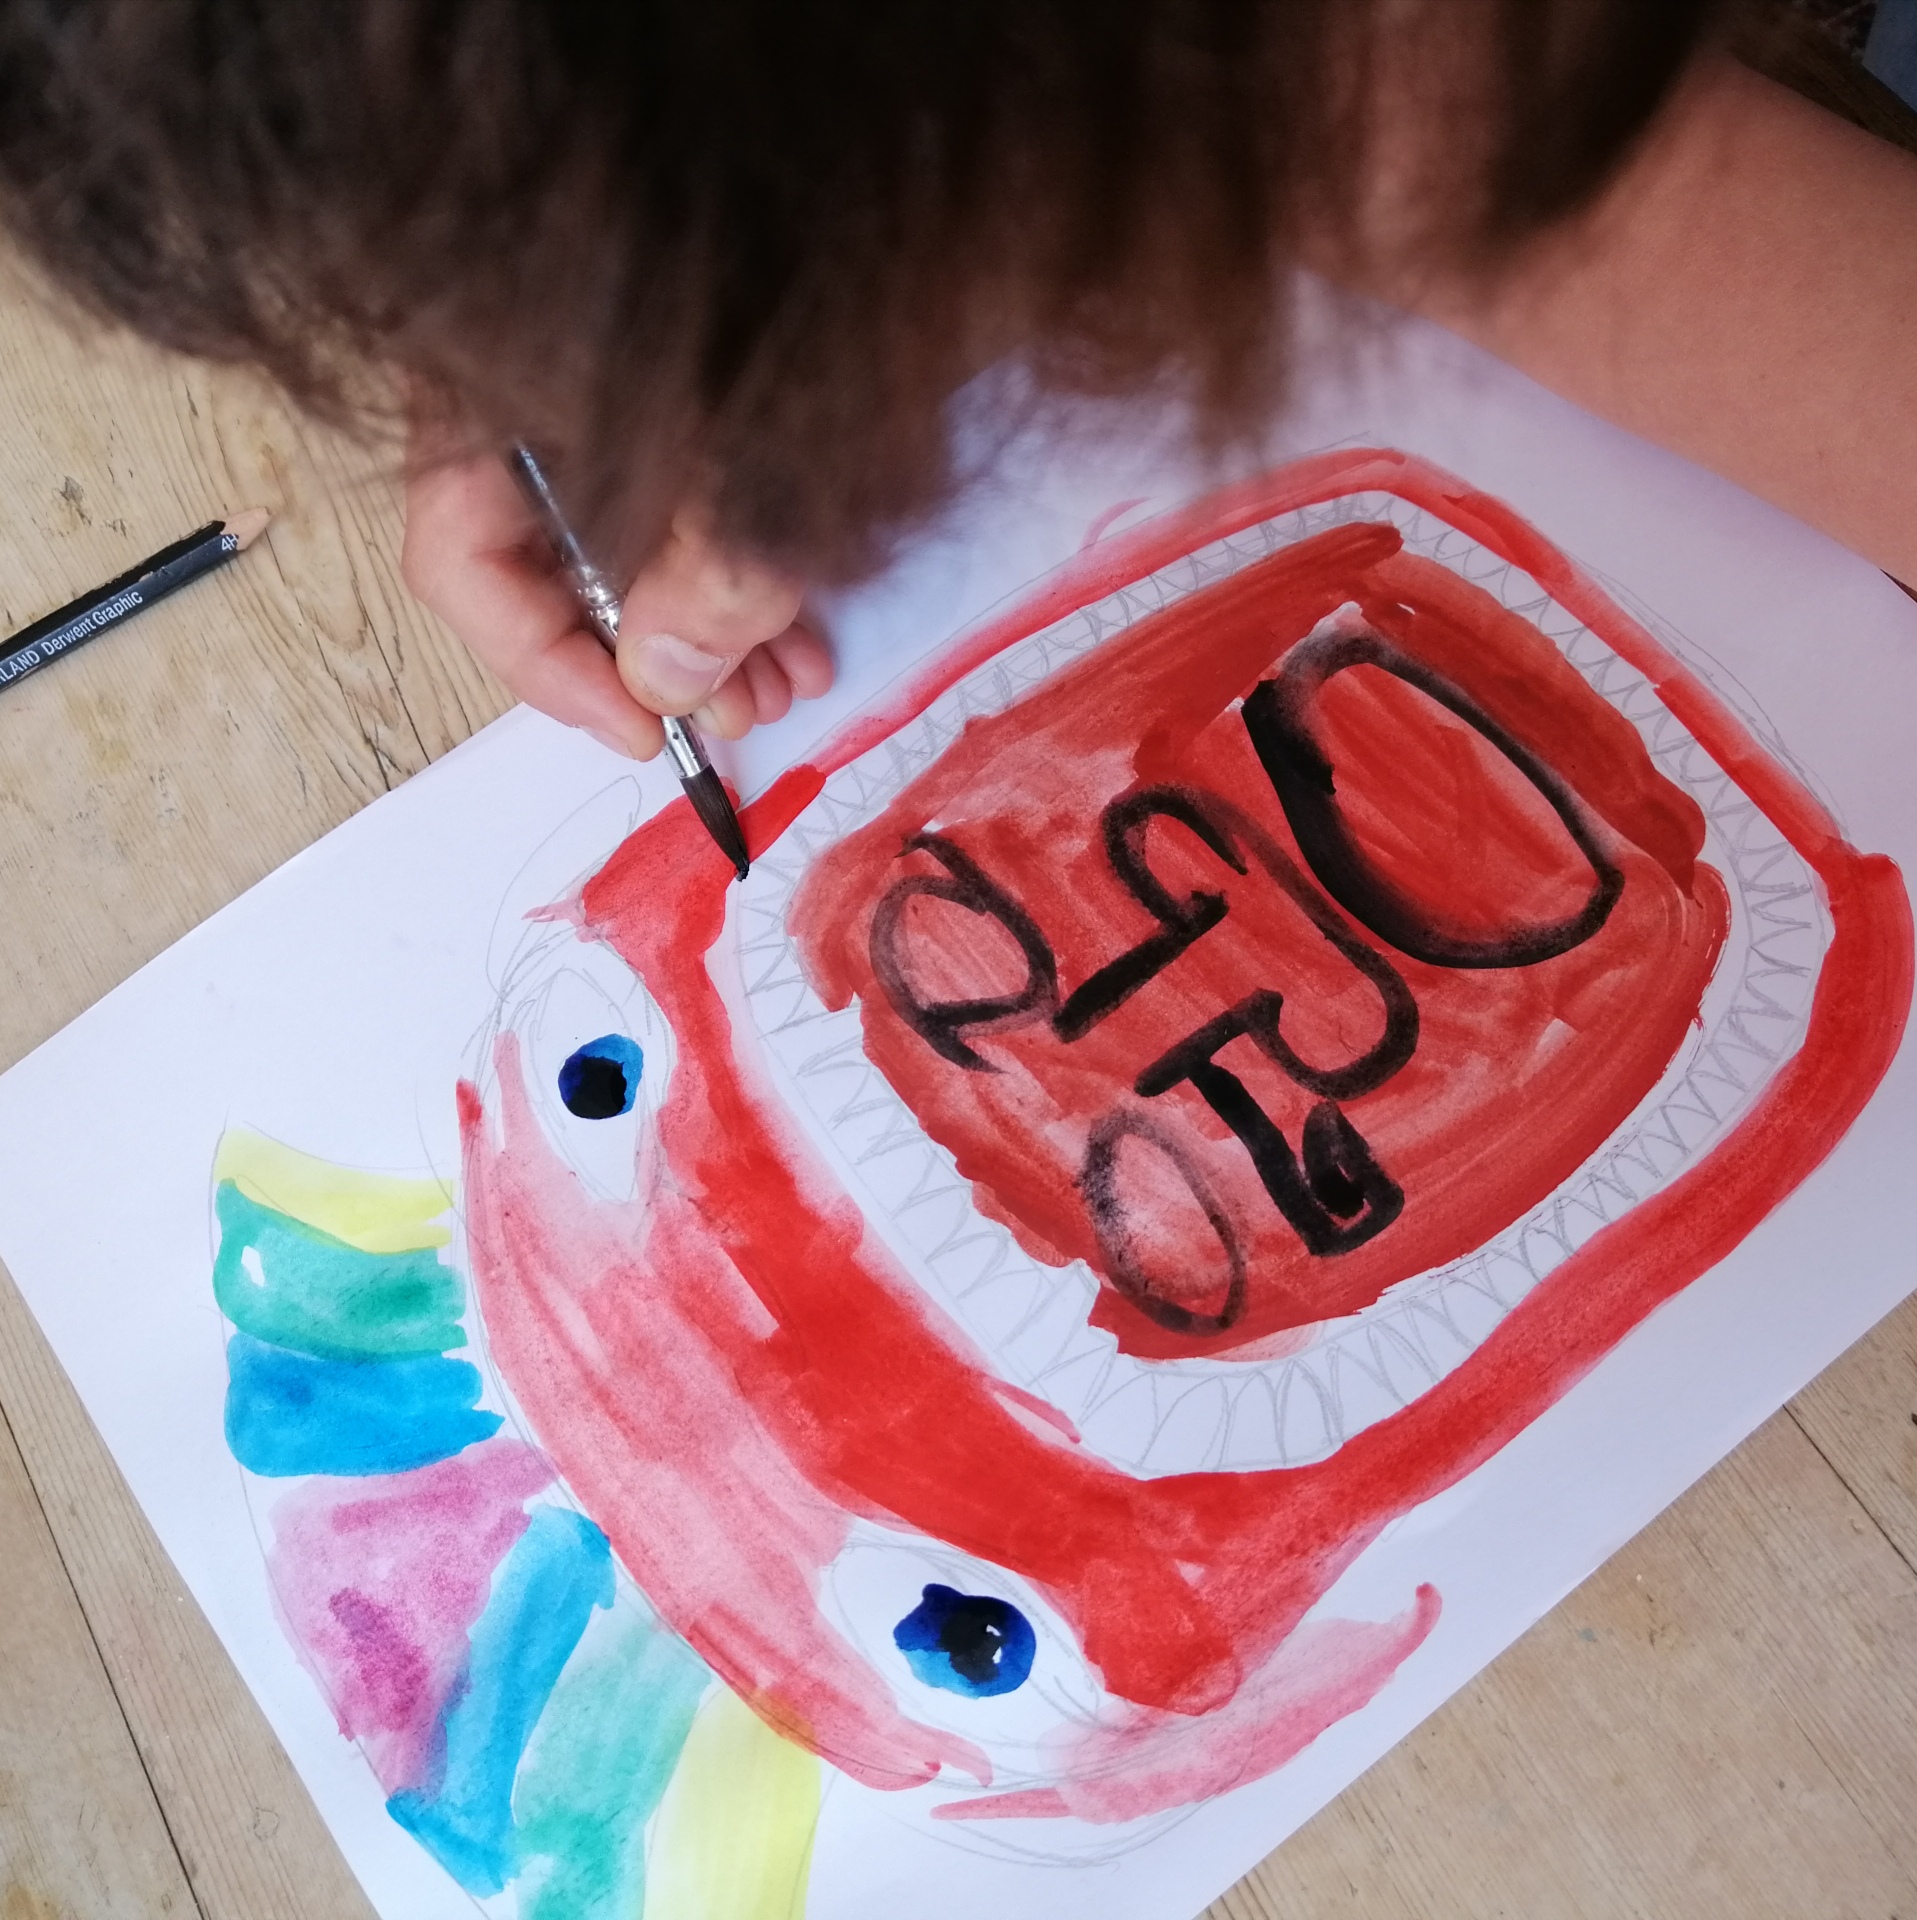
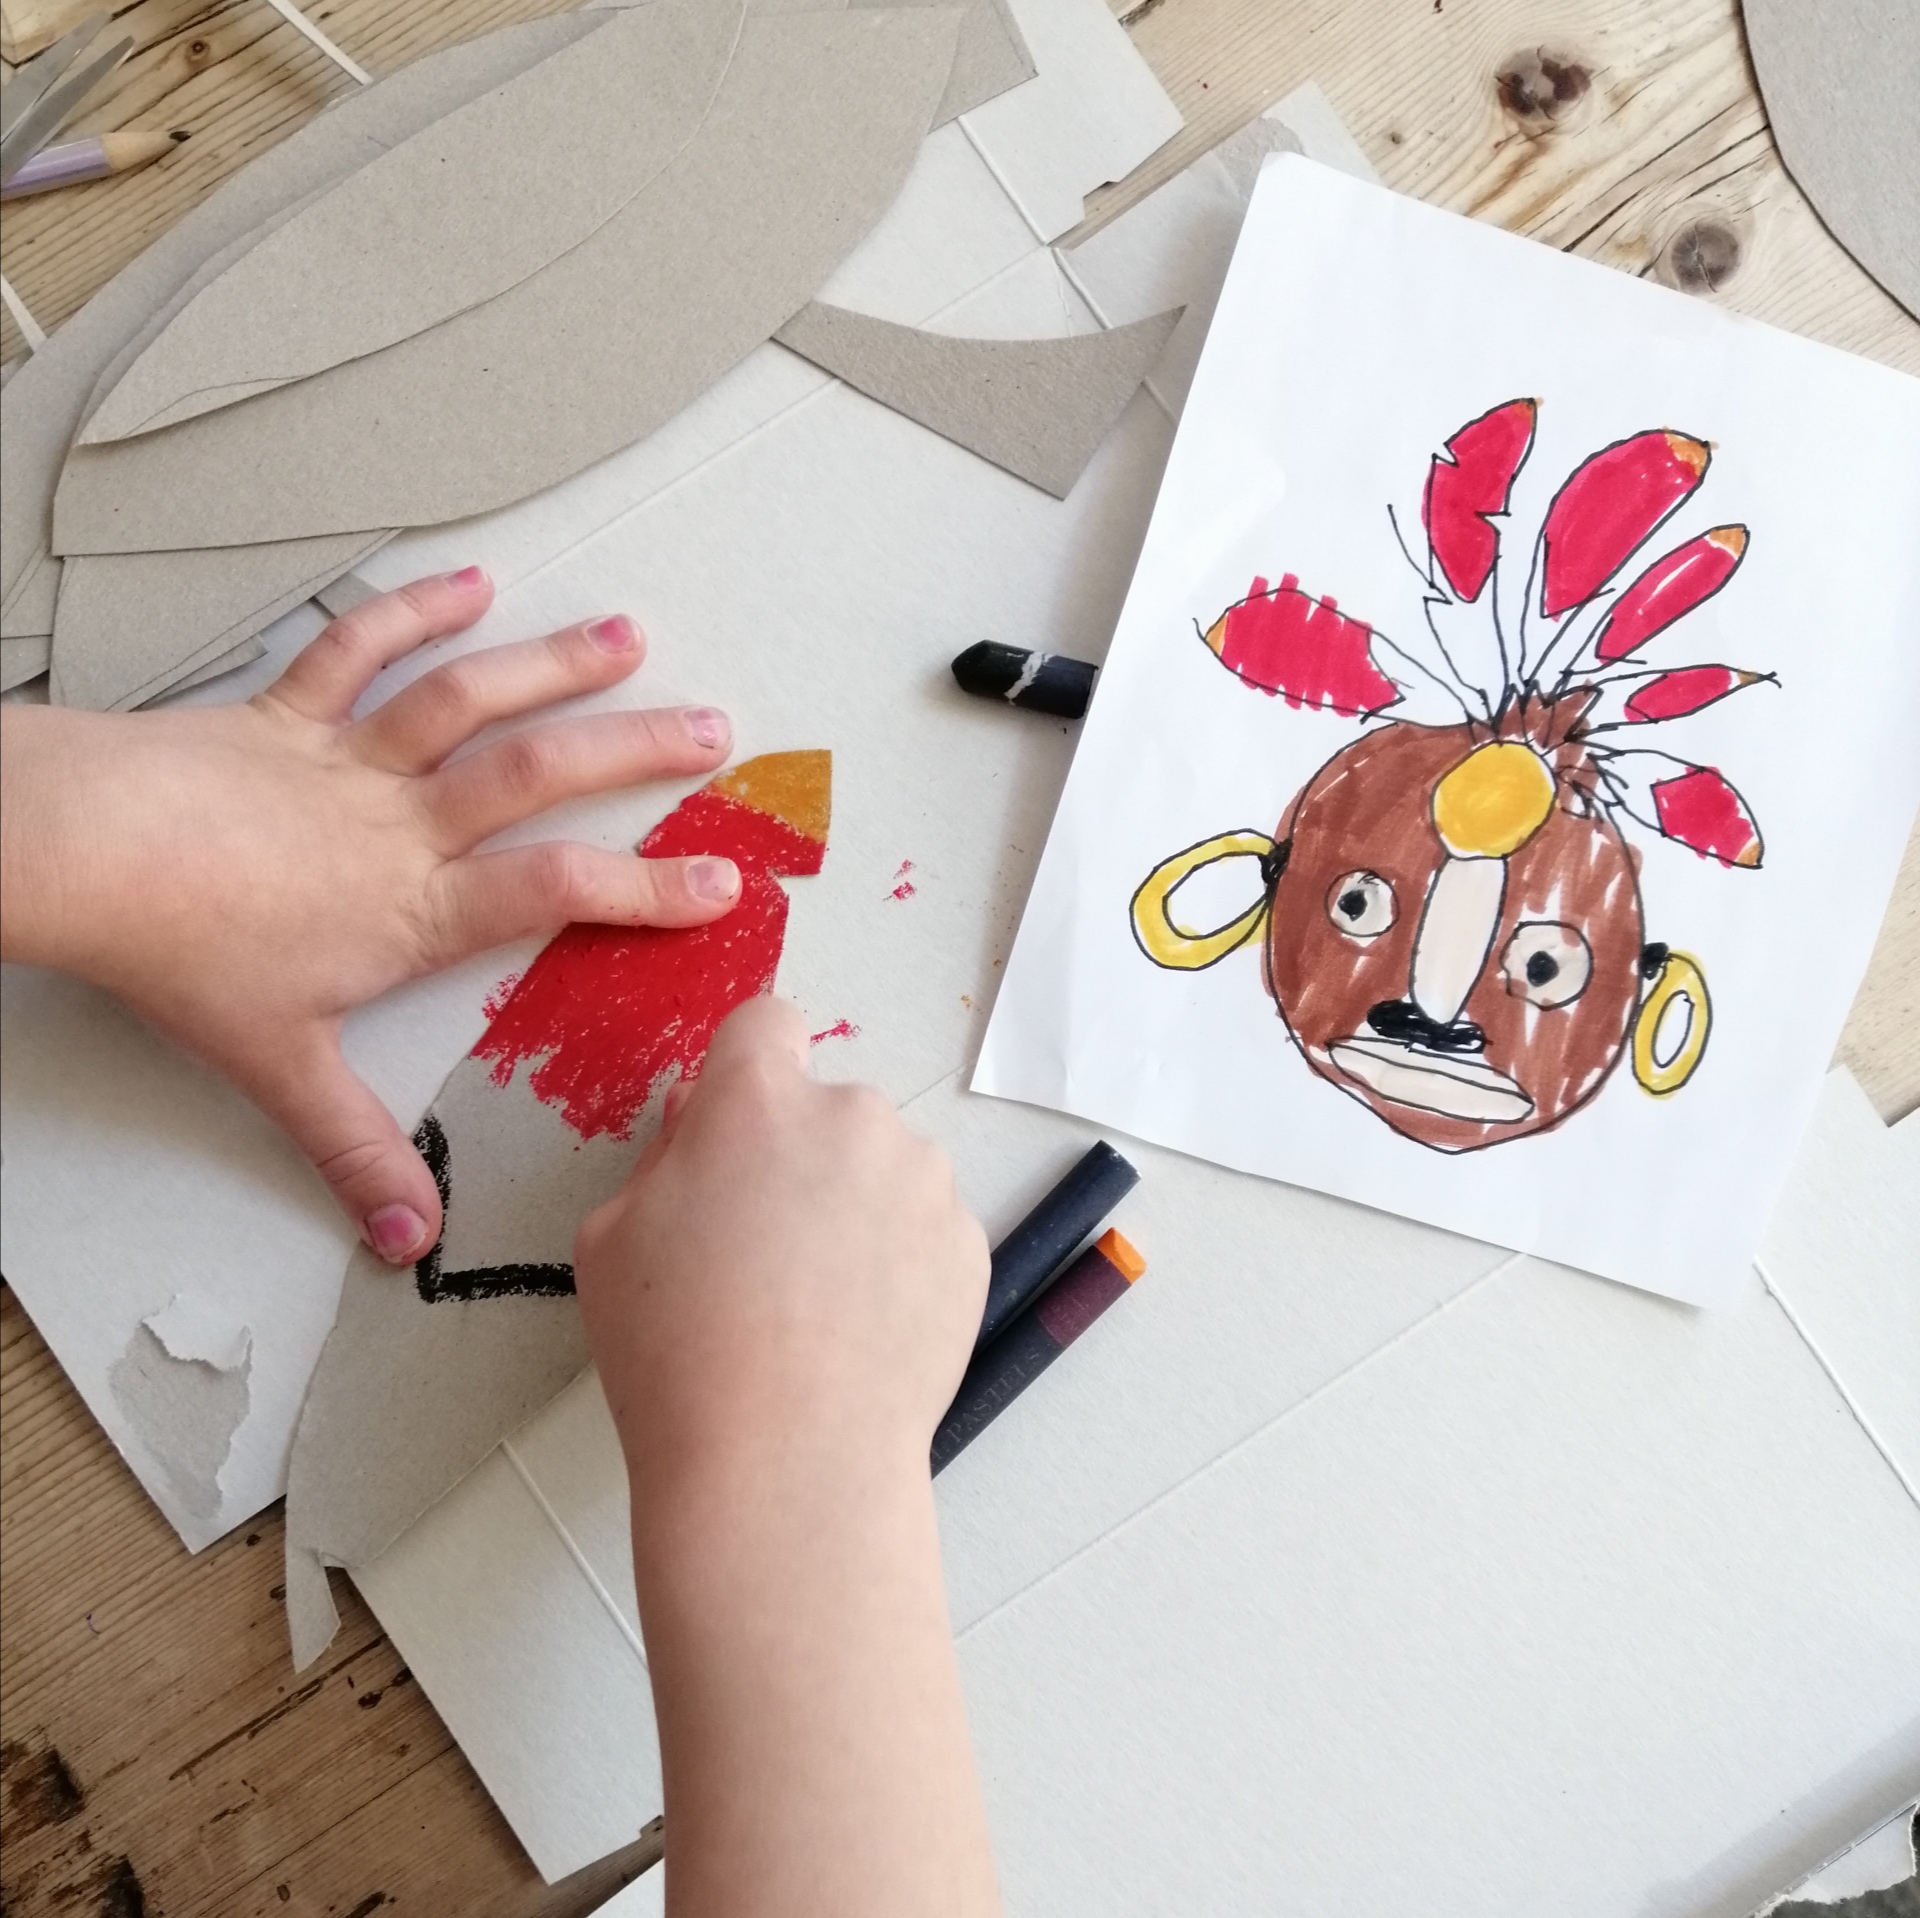
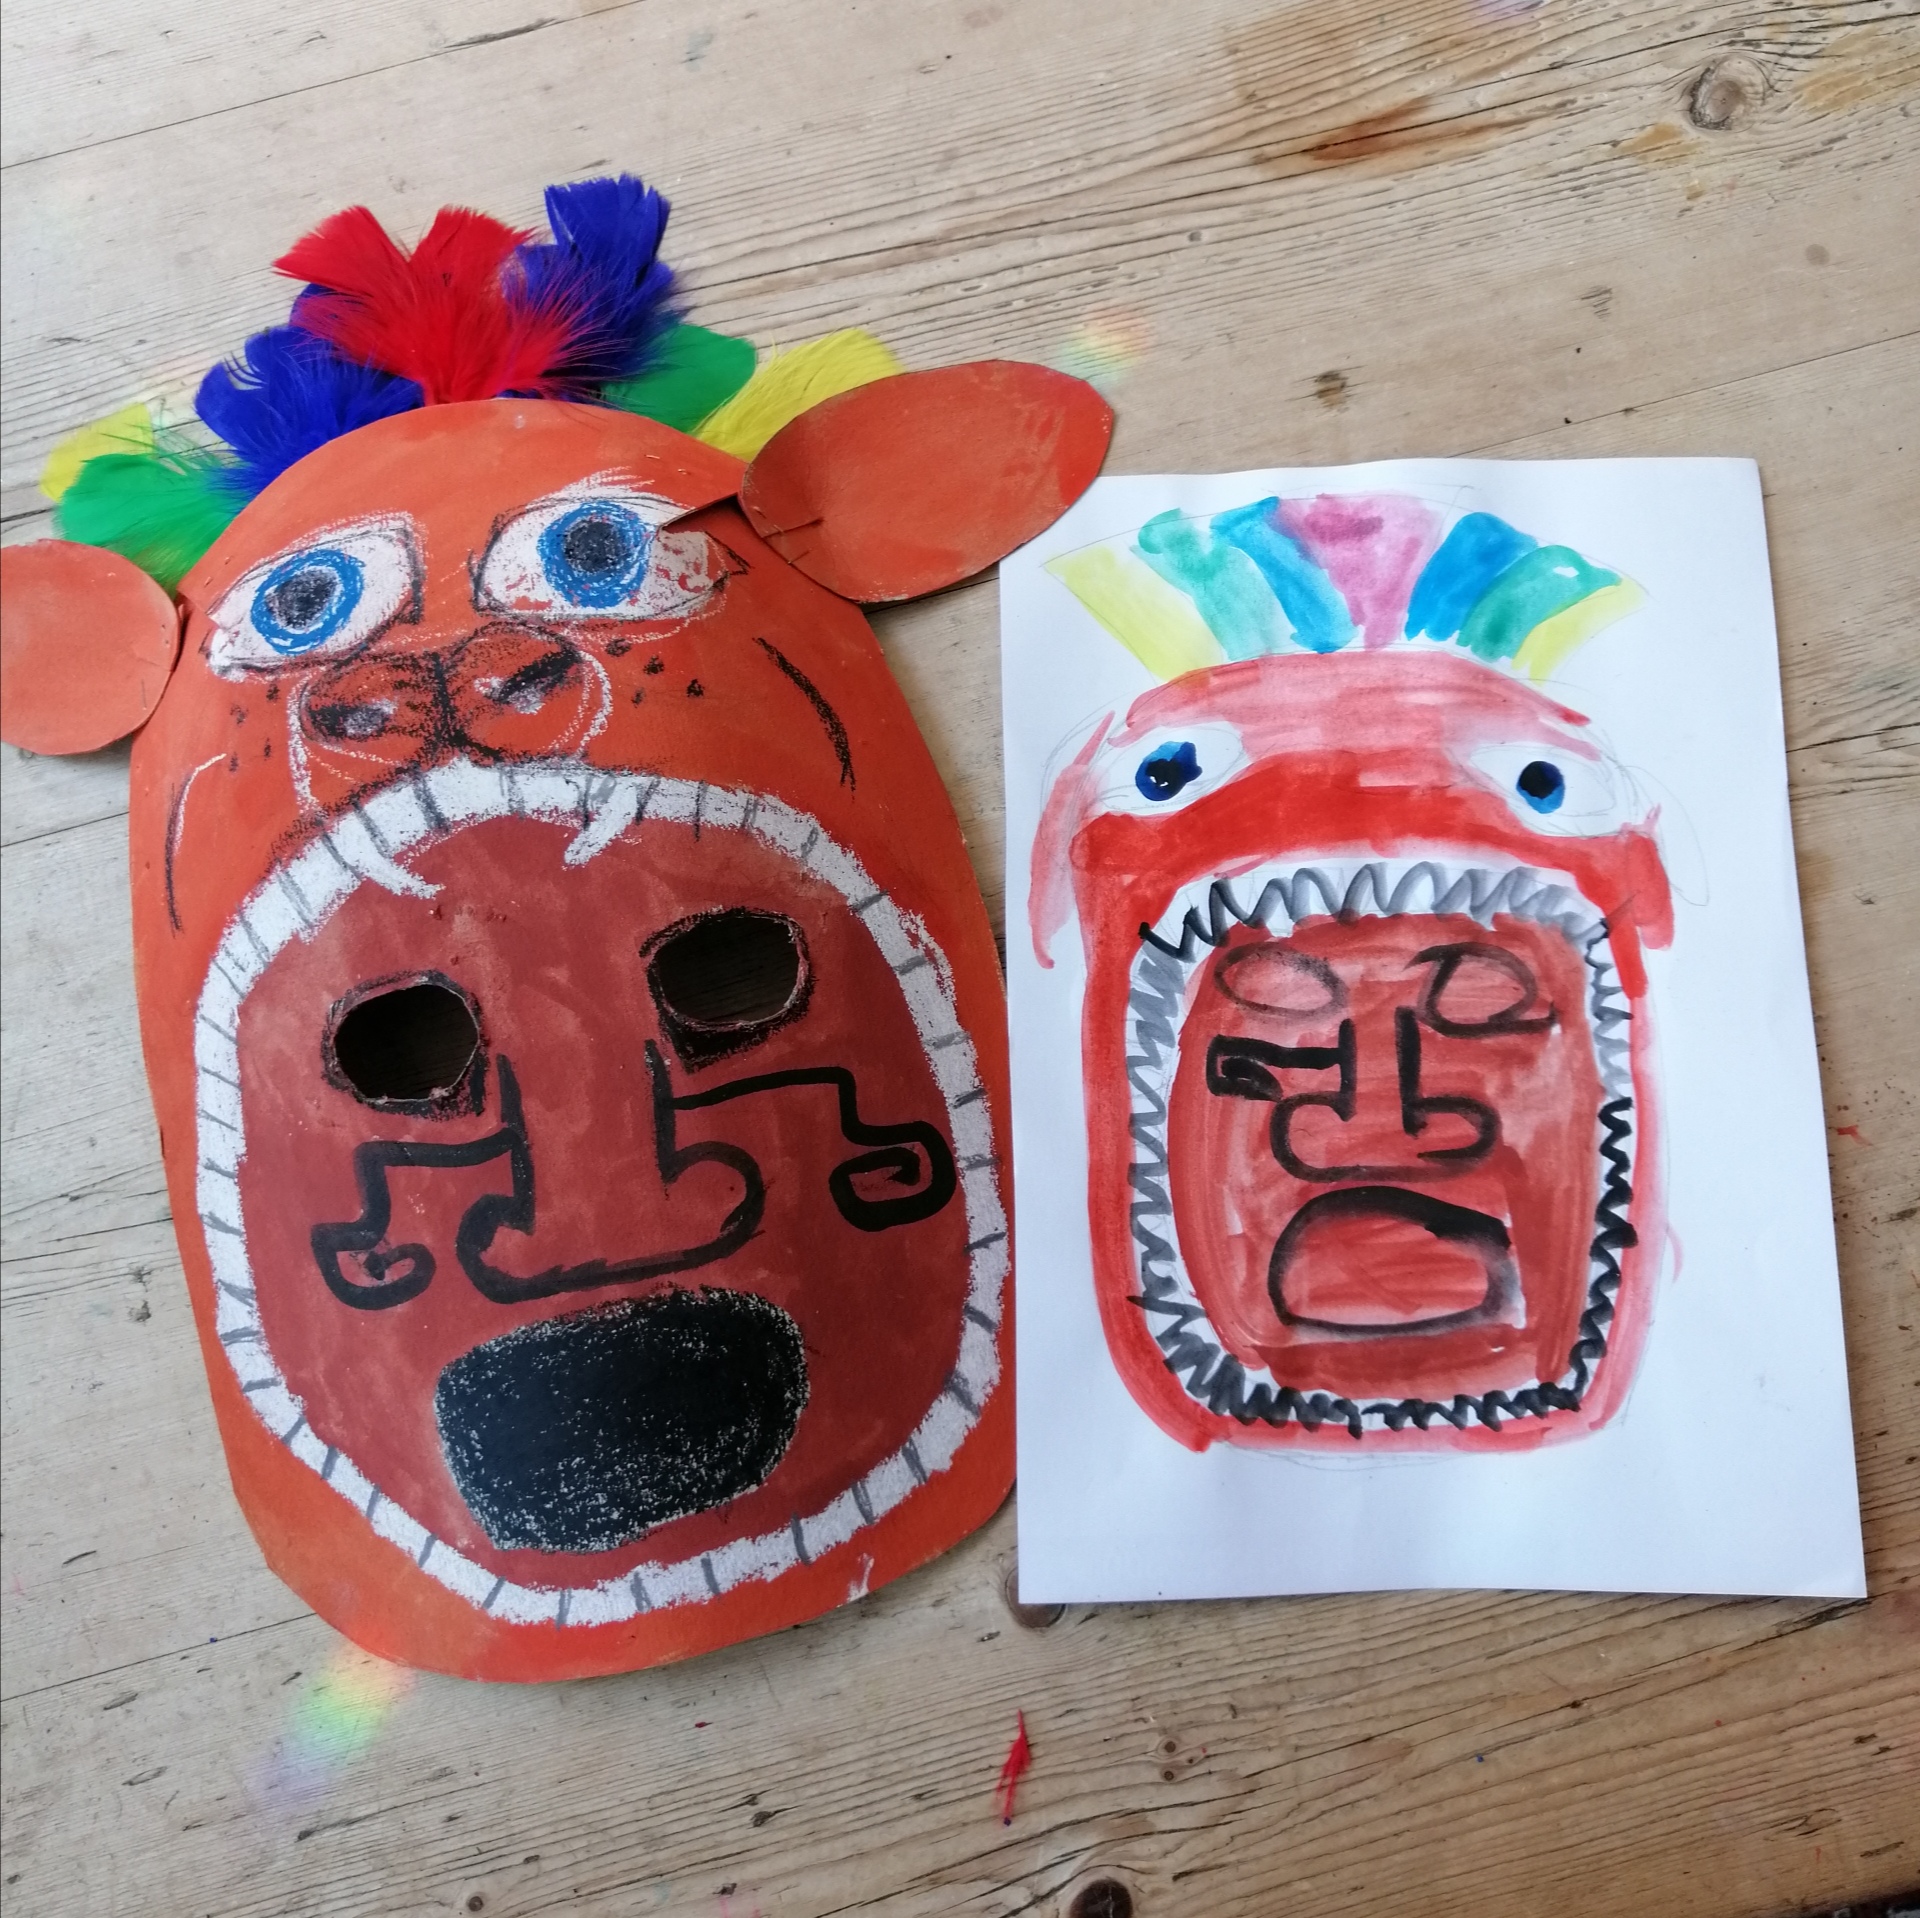
Then draw your design on the paper and give it colour. This is a very useful exercise as it will really help when you come to making the mask.
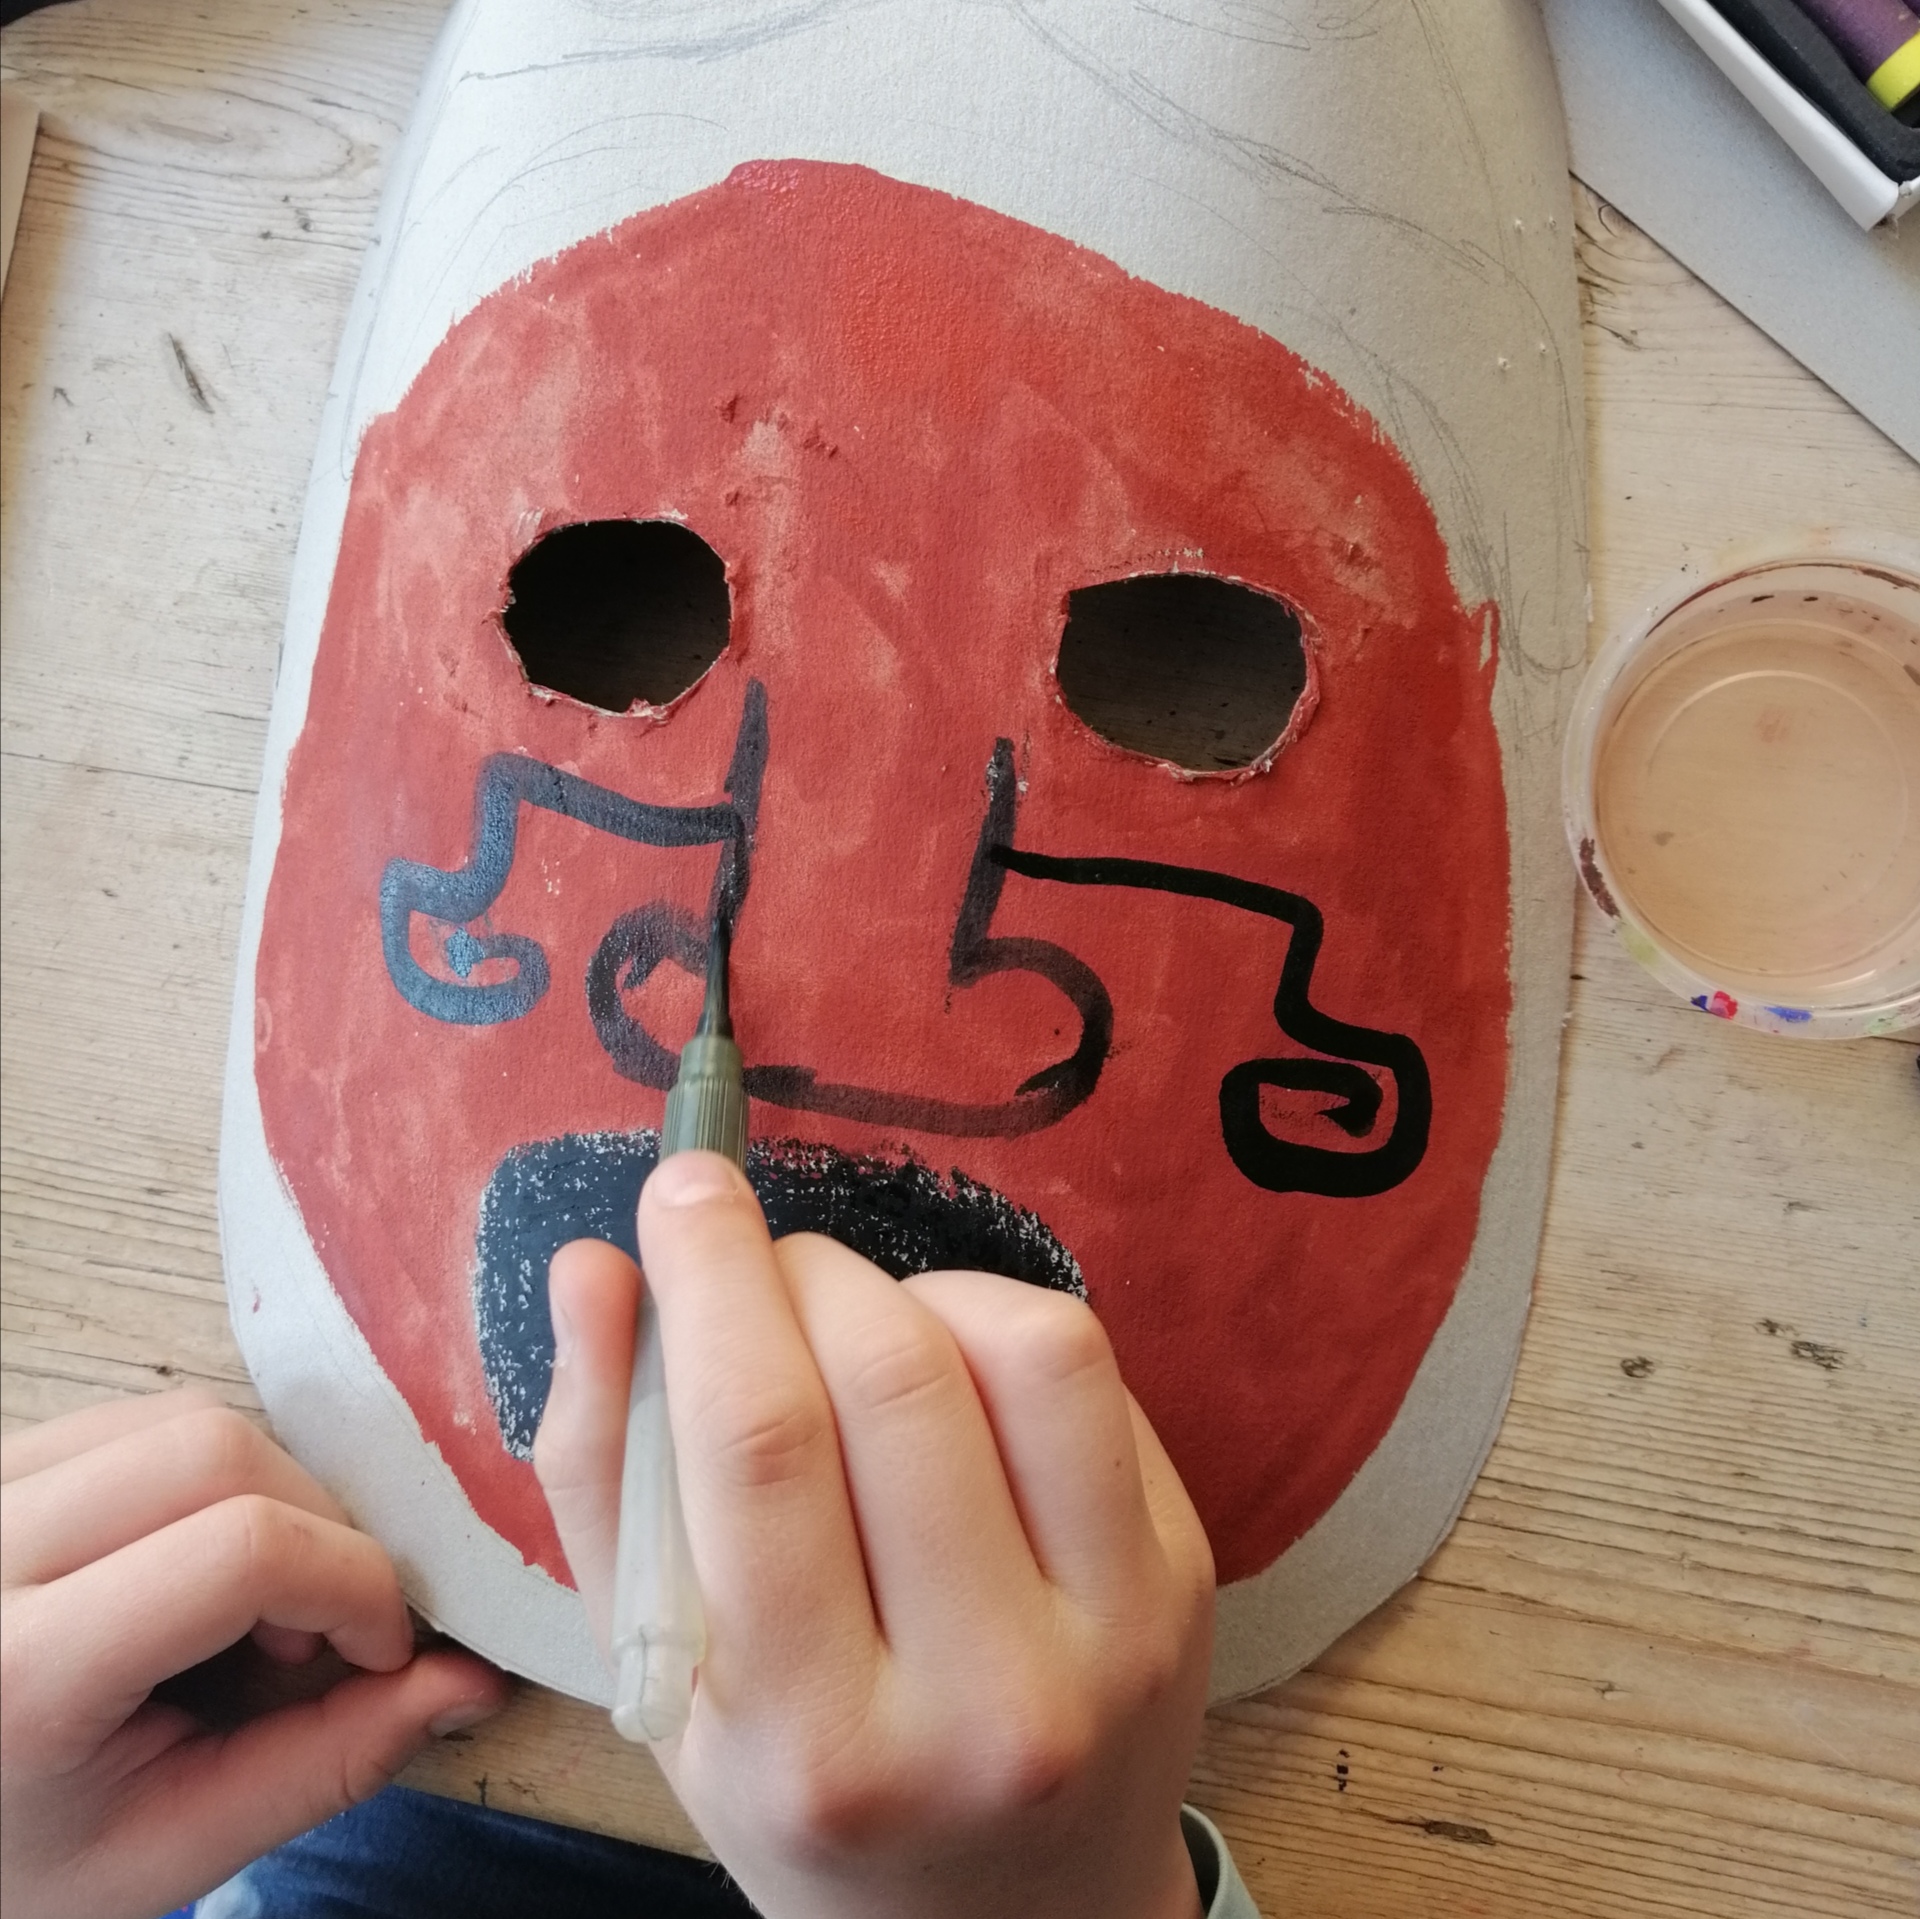
Once you got a finished design you can now think about how to make it as a mask. Look at the shapes you have with it and start to cut those shapes out. We found it much easier to cut the shapes and colour them as we went, then all the pieces can be assembled.
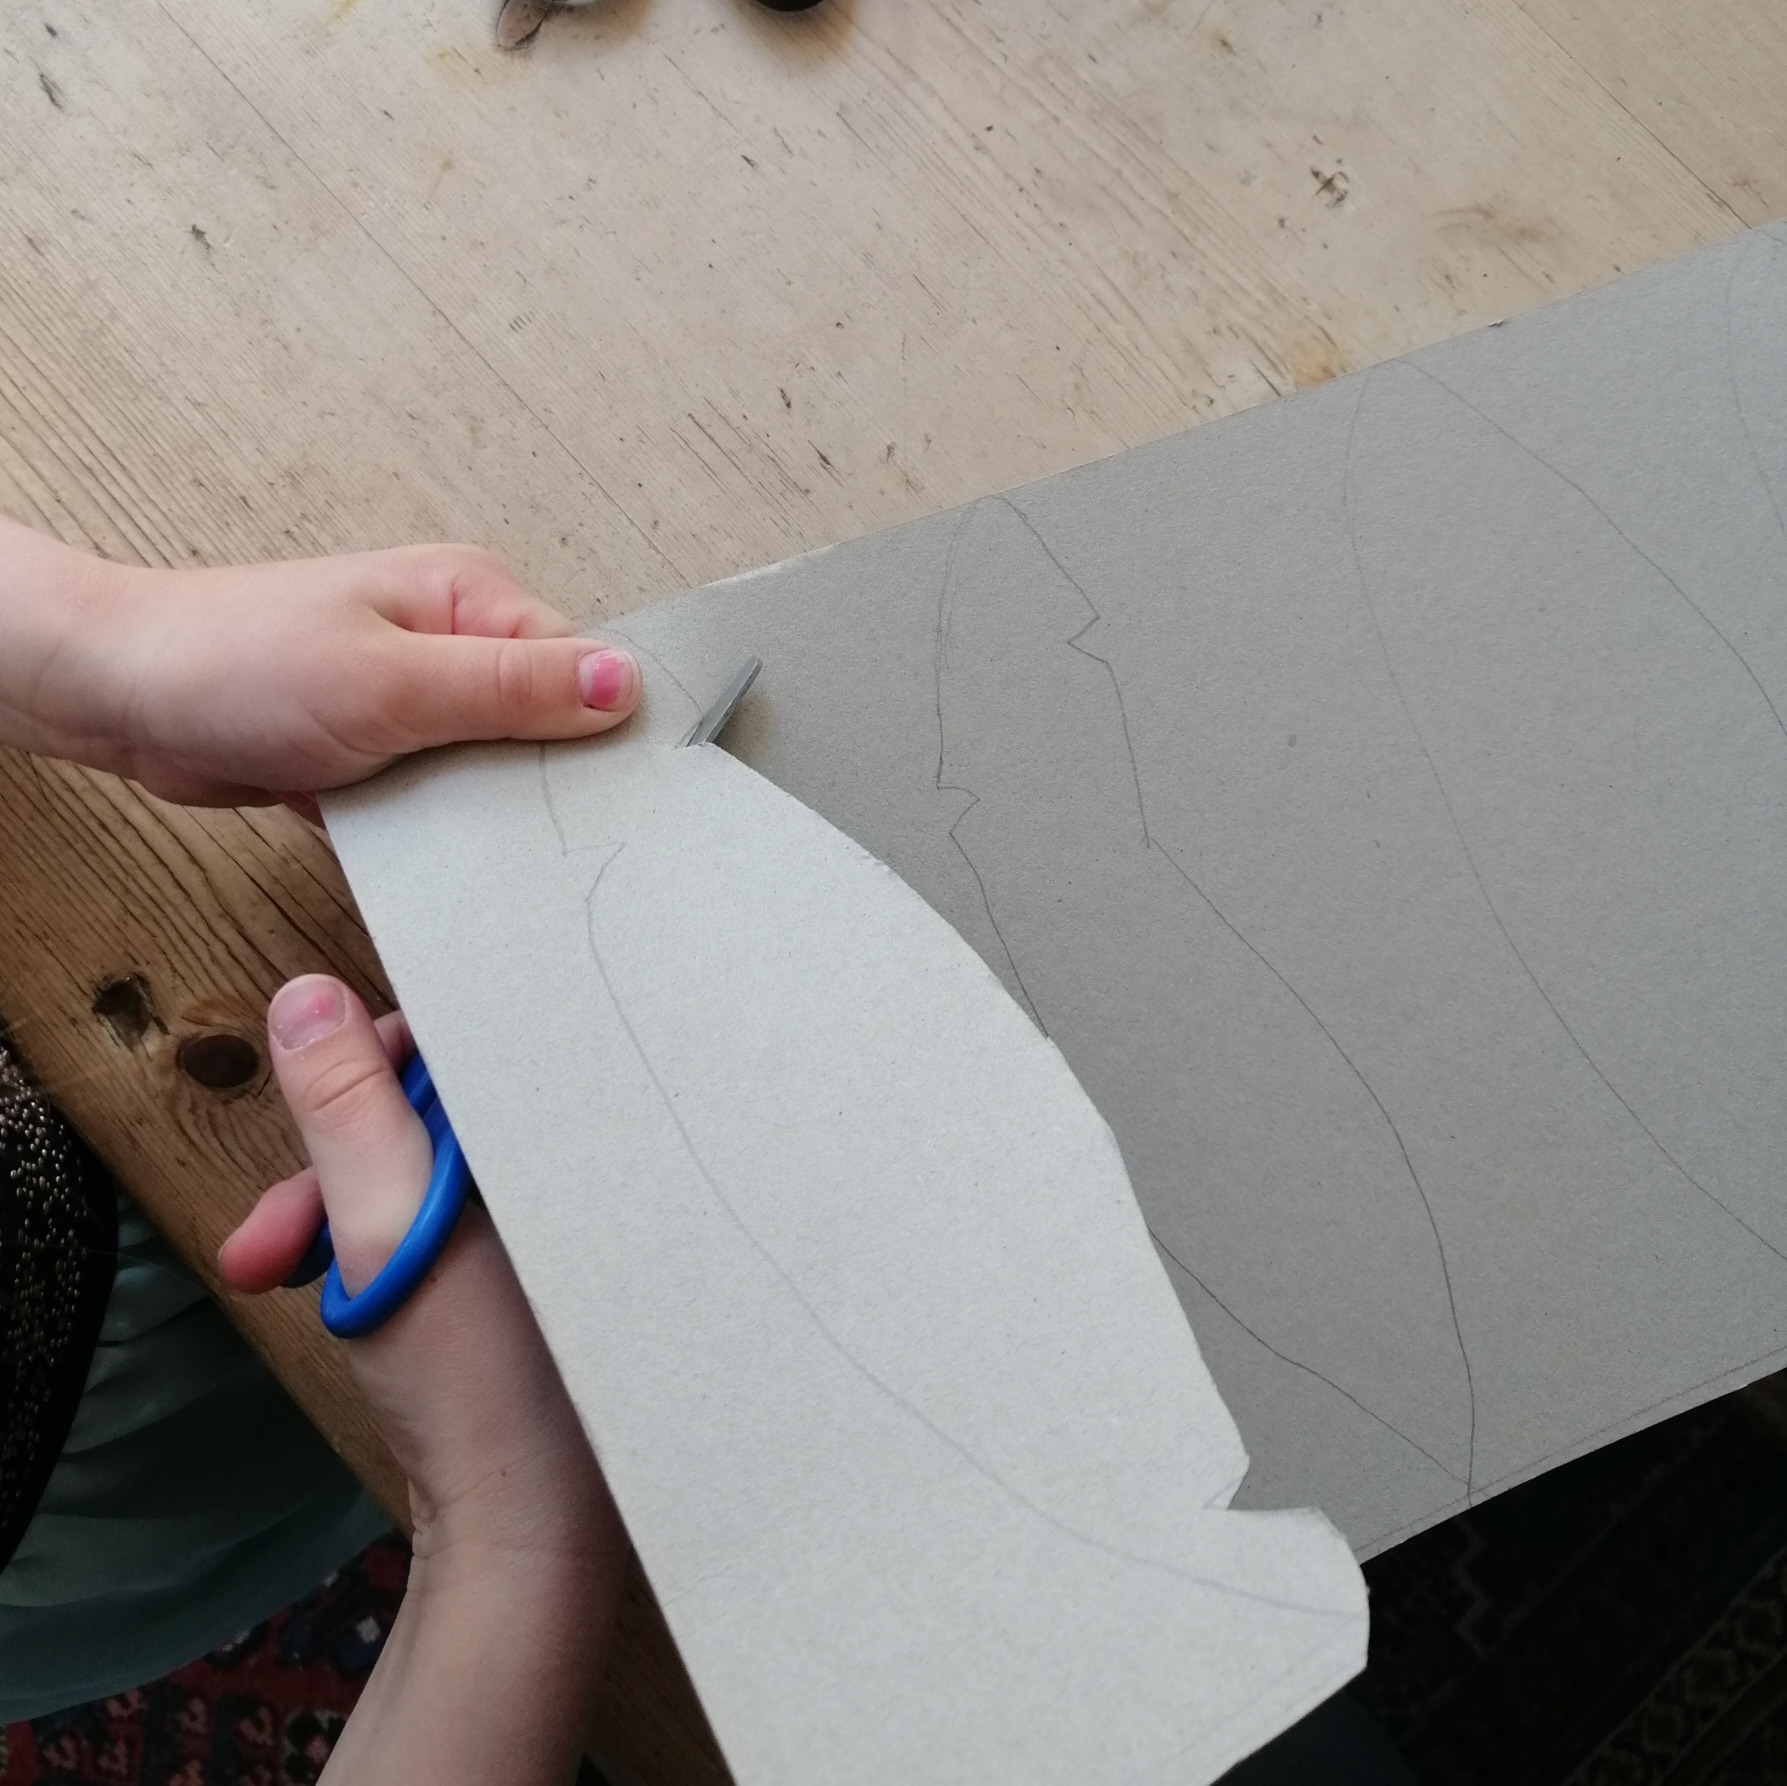
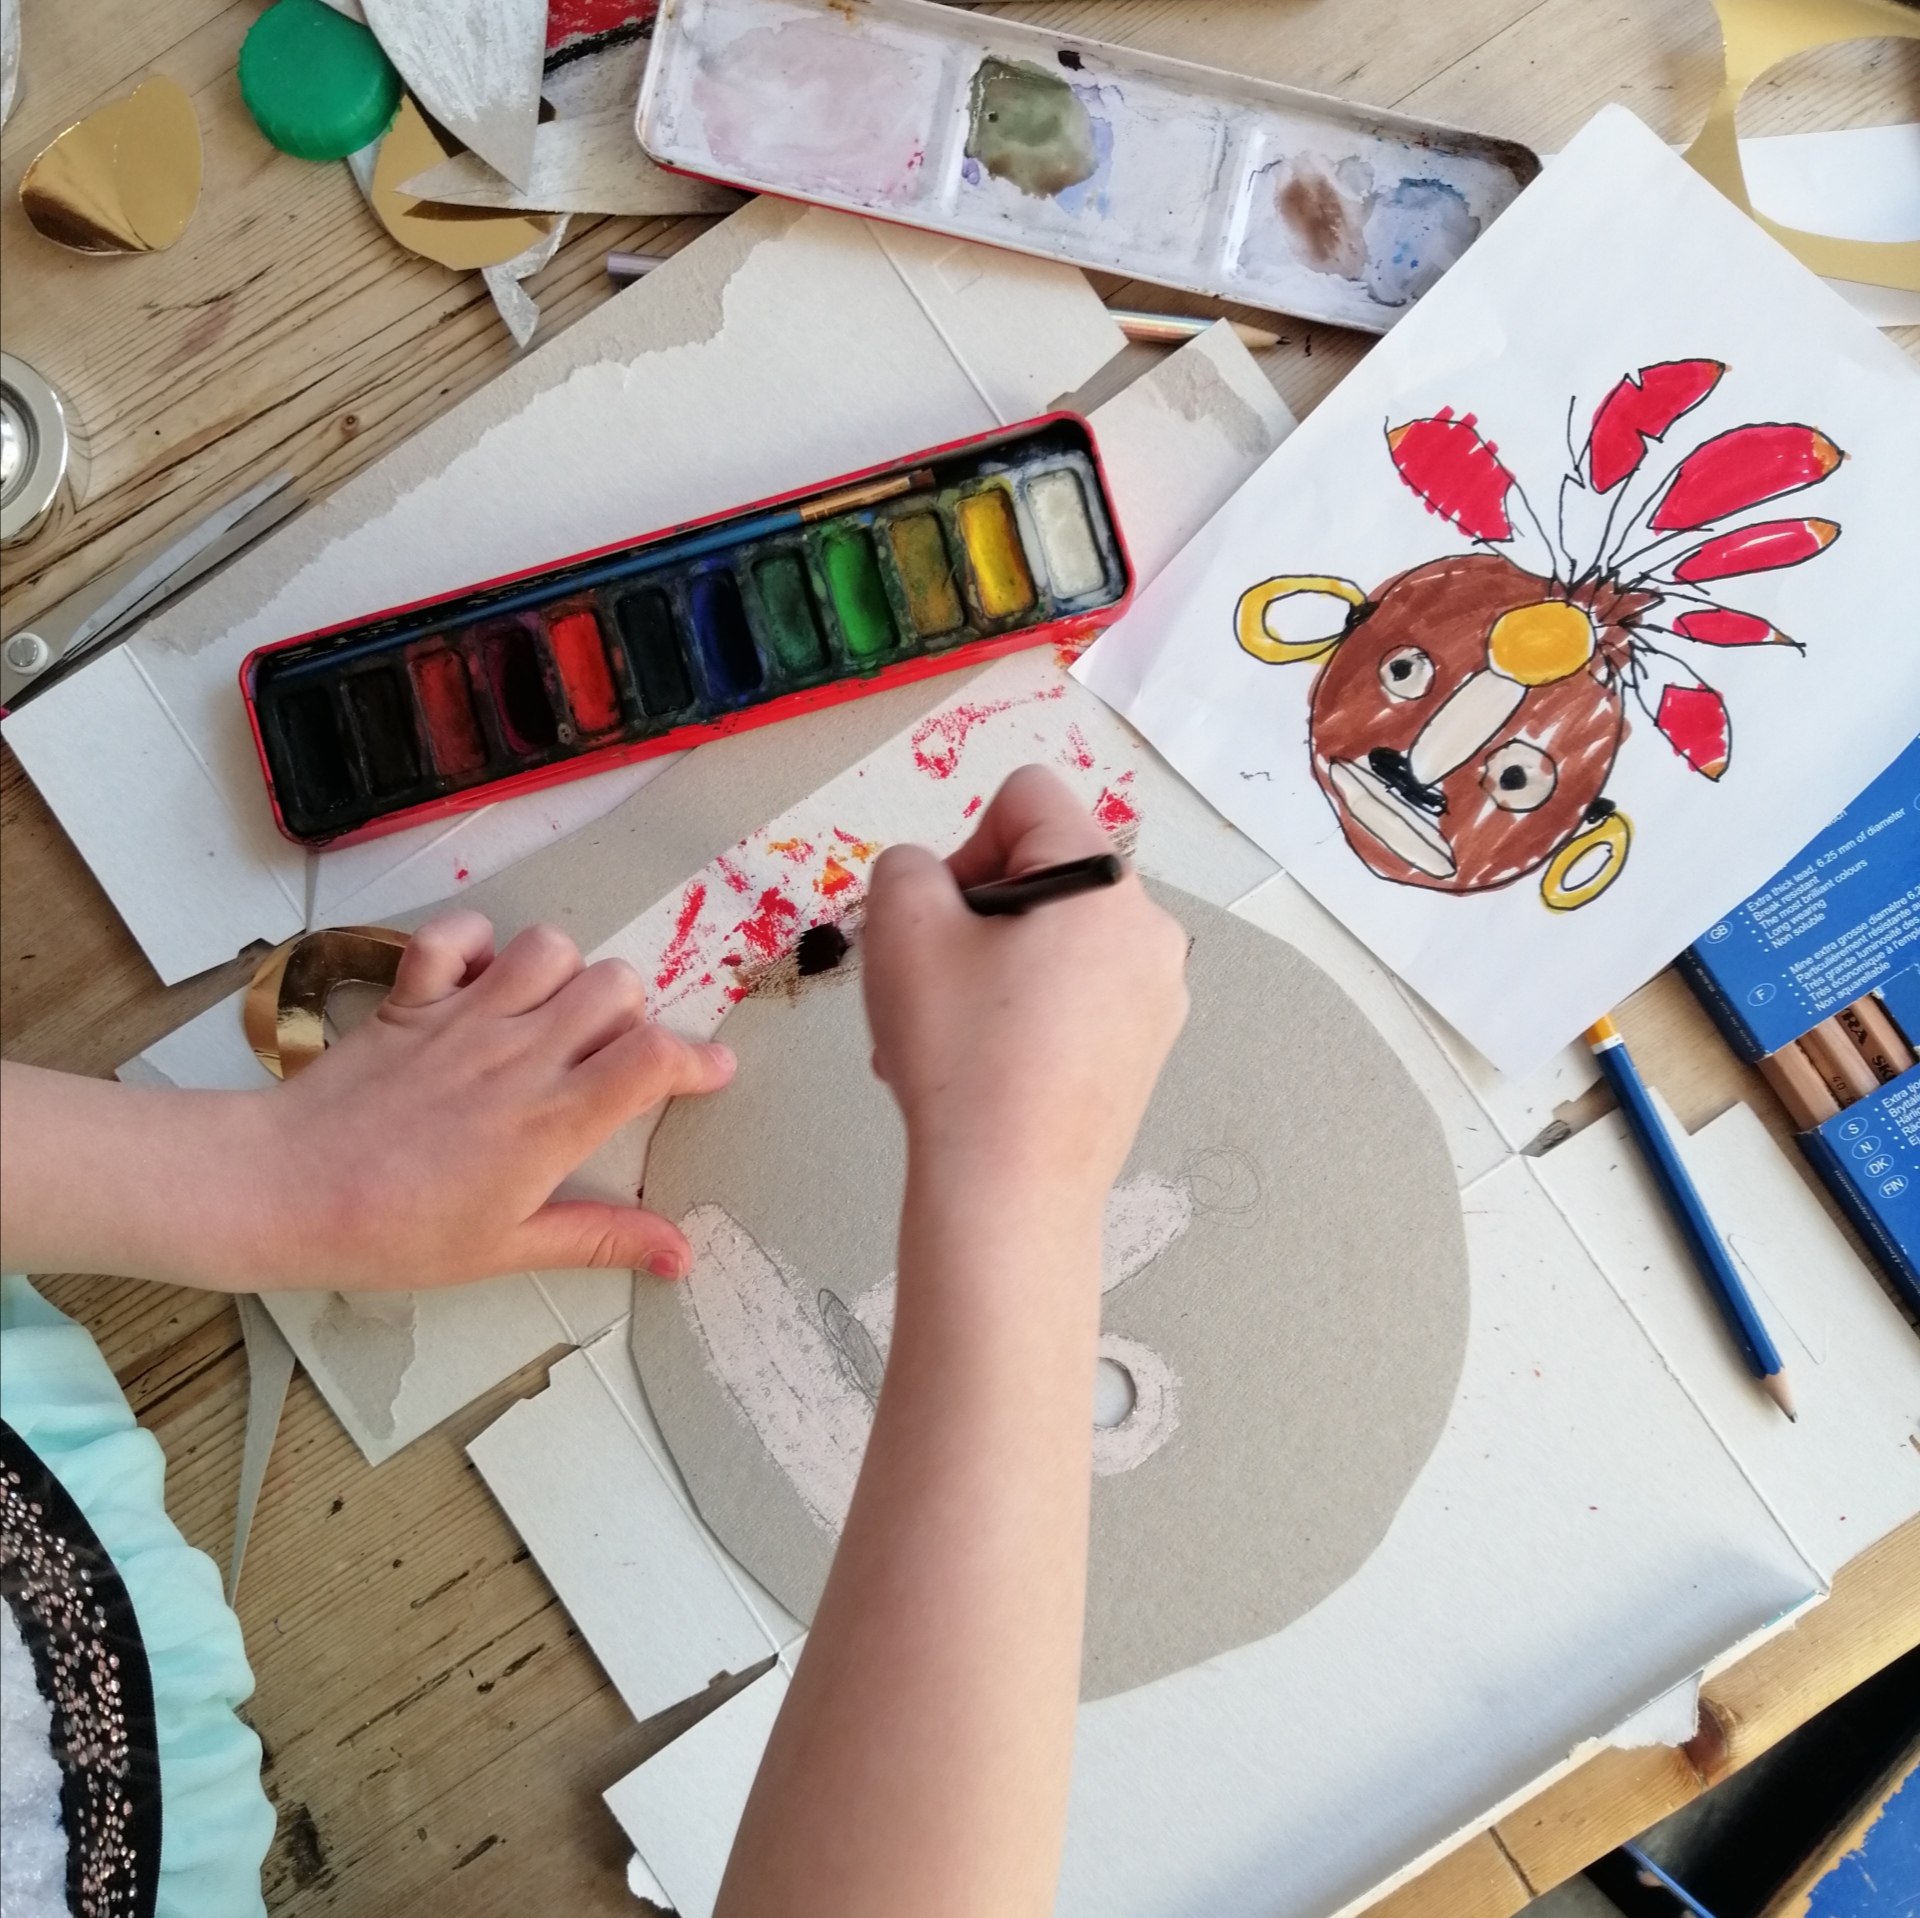
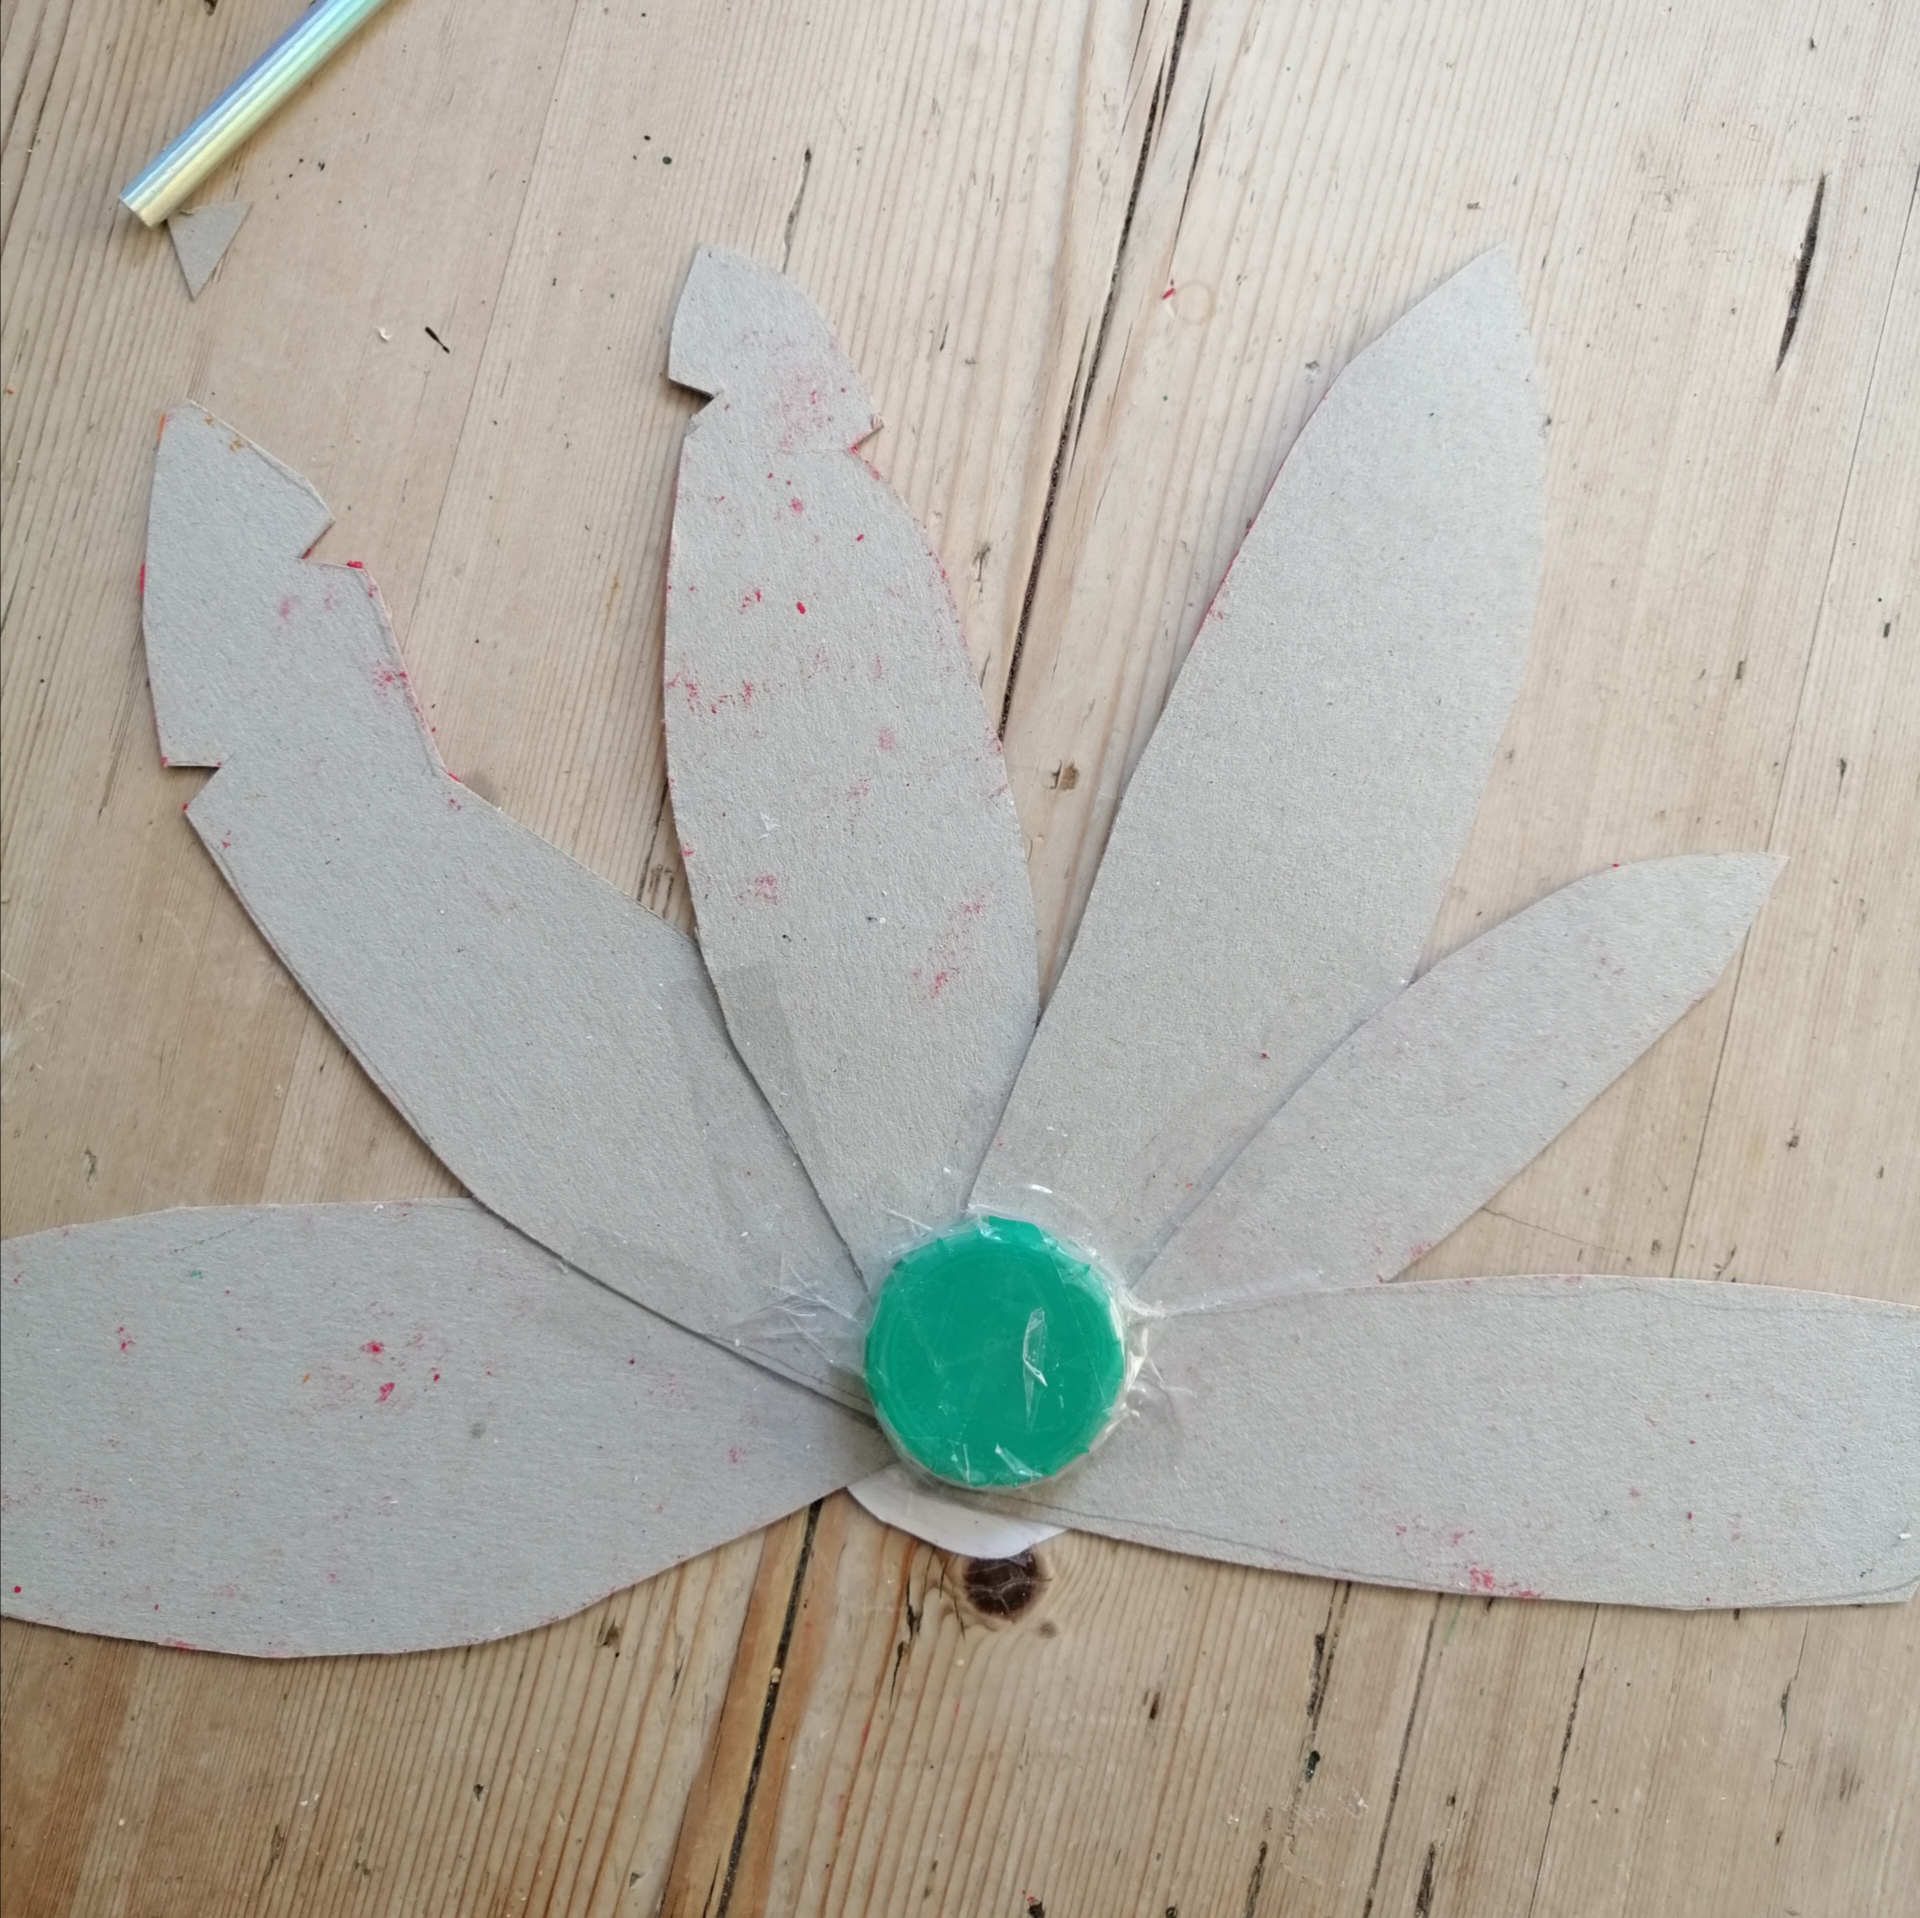
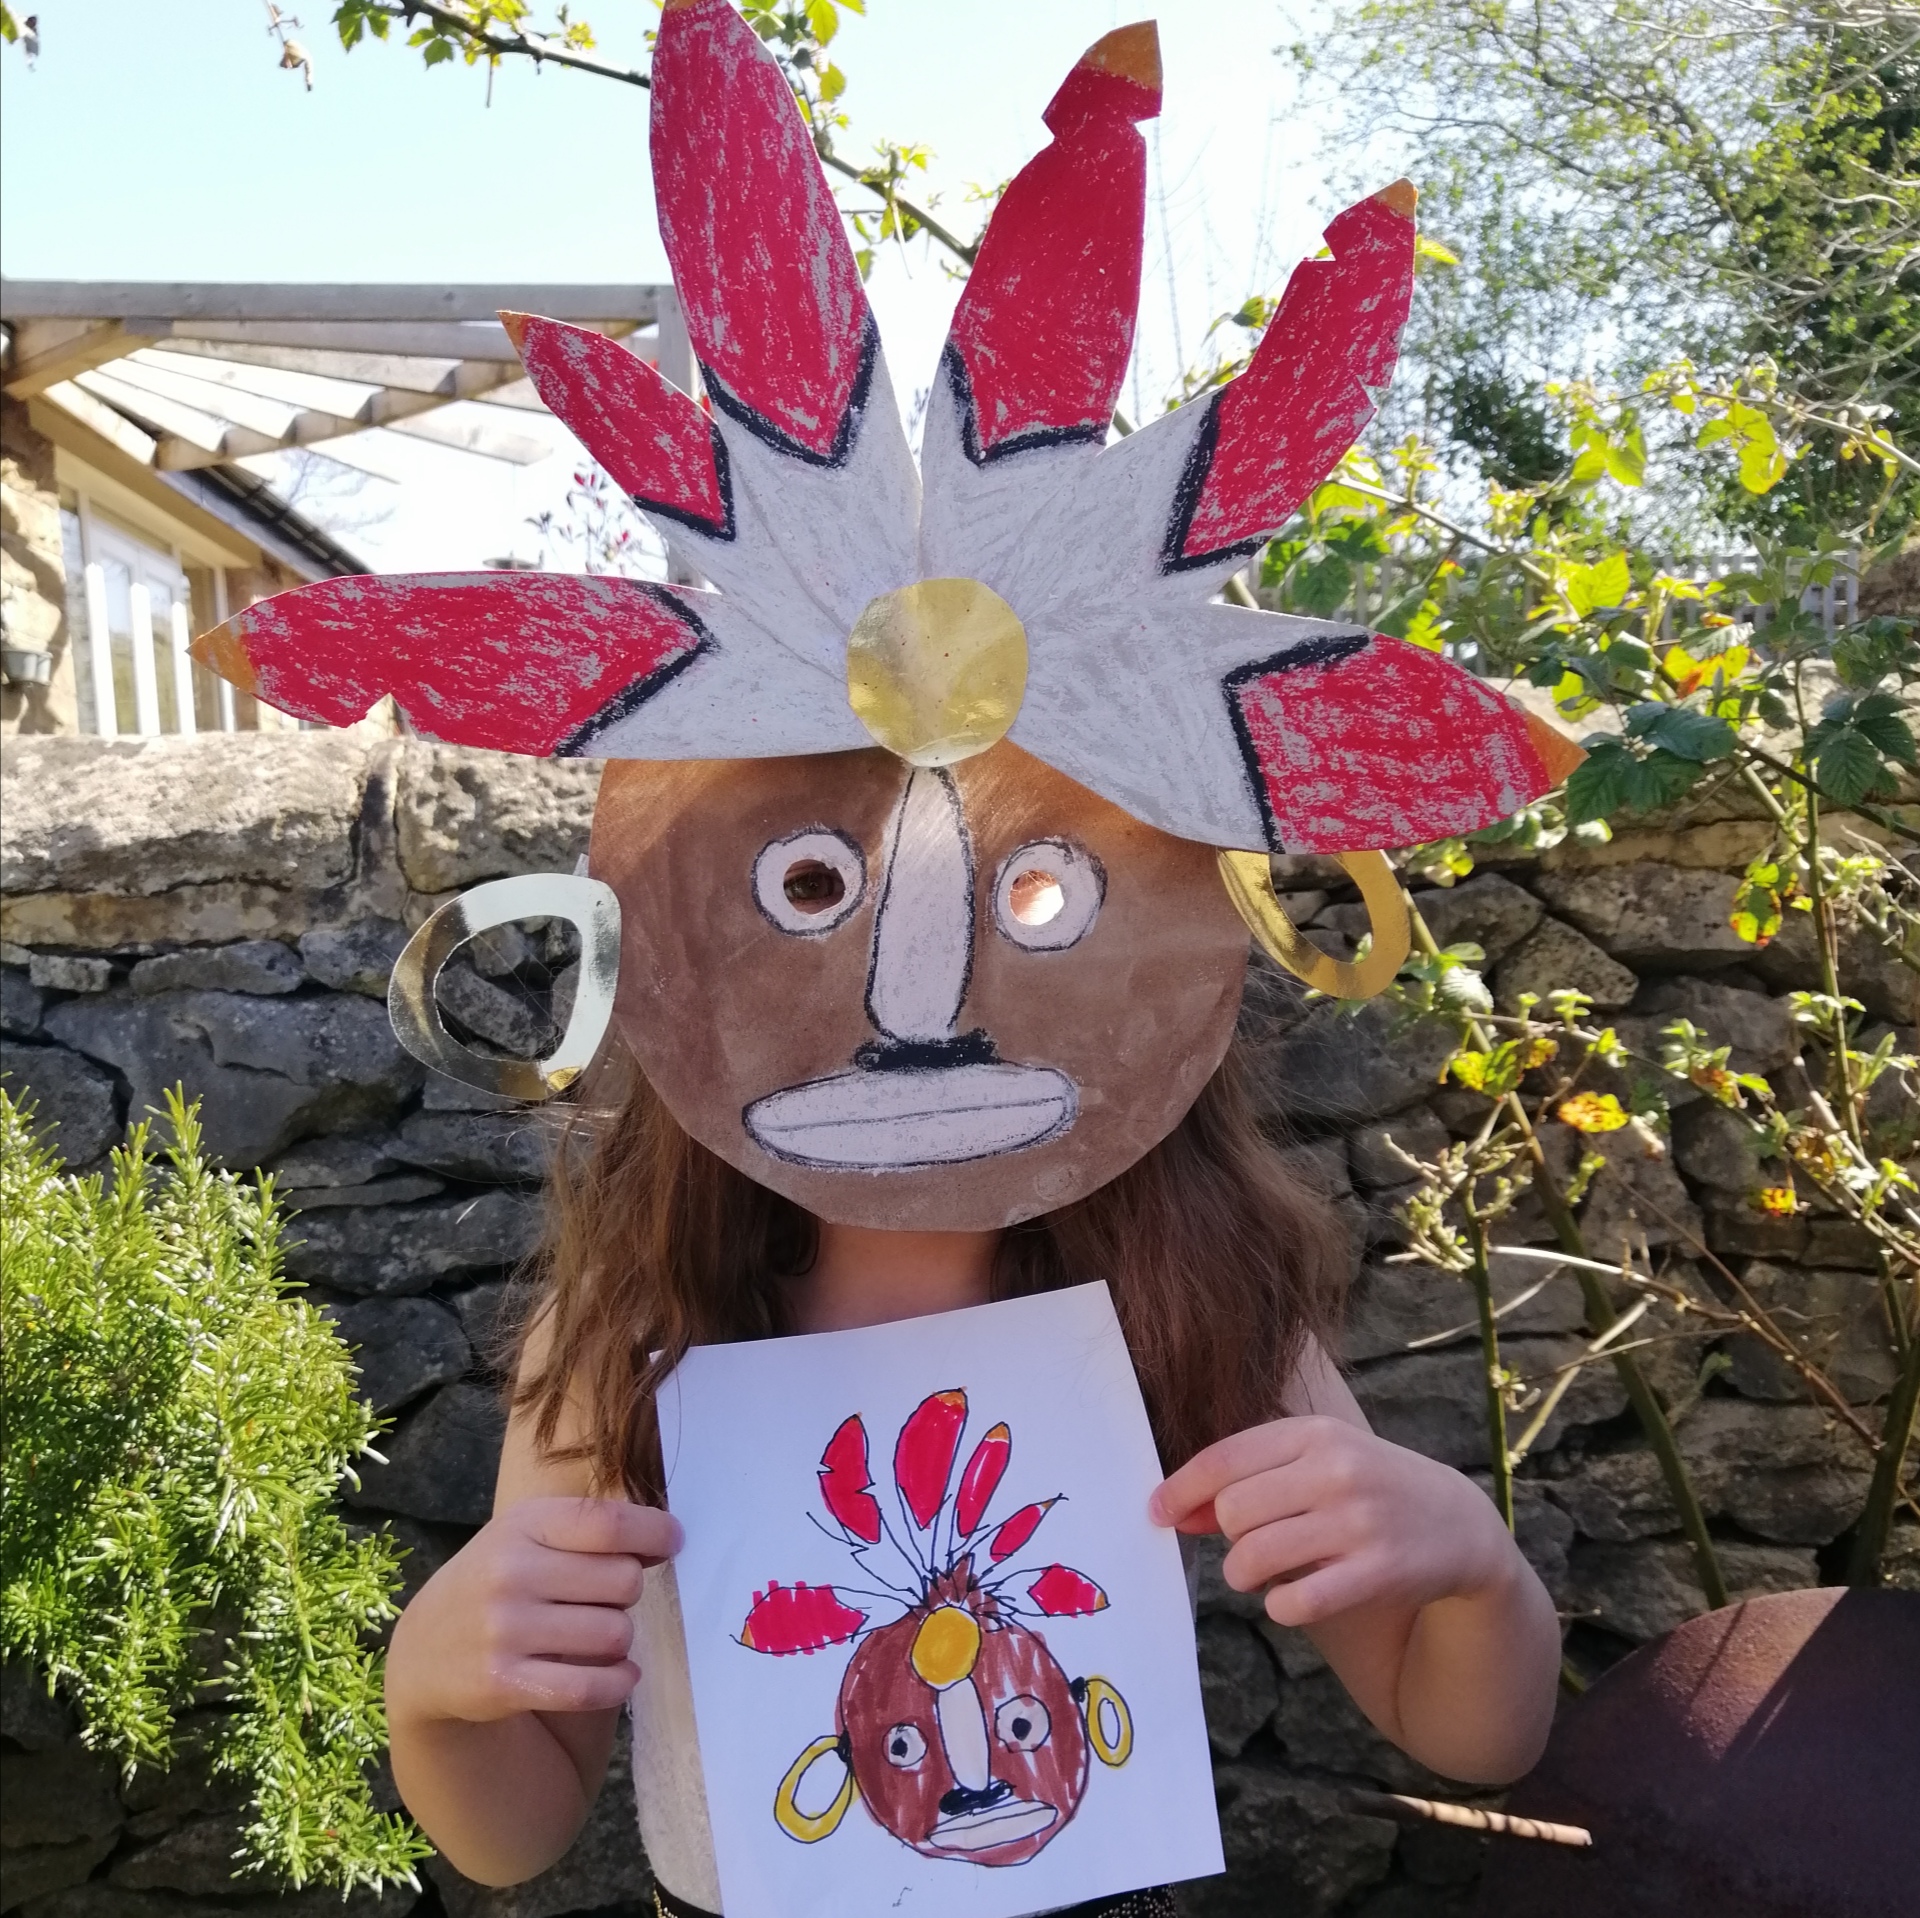
We looked at the size of the feathers compared to the face and discovered they were about the same length. Renn started by drawing and cutting out the feather headdress and then we drew around a plate to get the right-sized shape for the face. She coloured in the feathers and the face and we found some gold card for the earings and front on the headdress. Having her design made it much easier for her to understand the process and what she needed to do next.
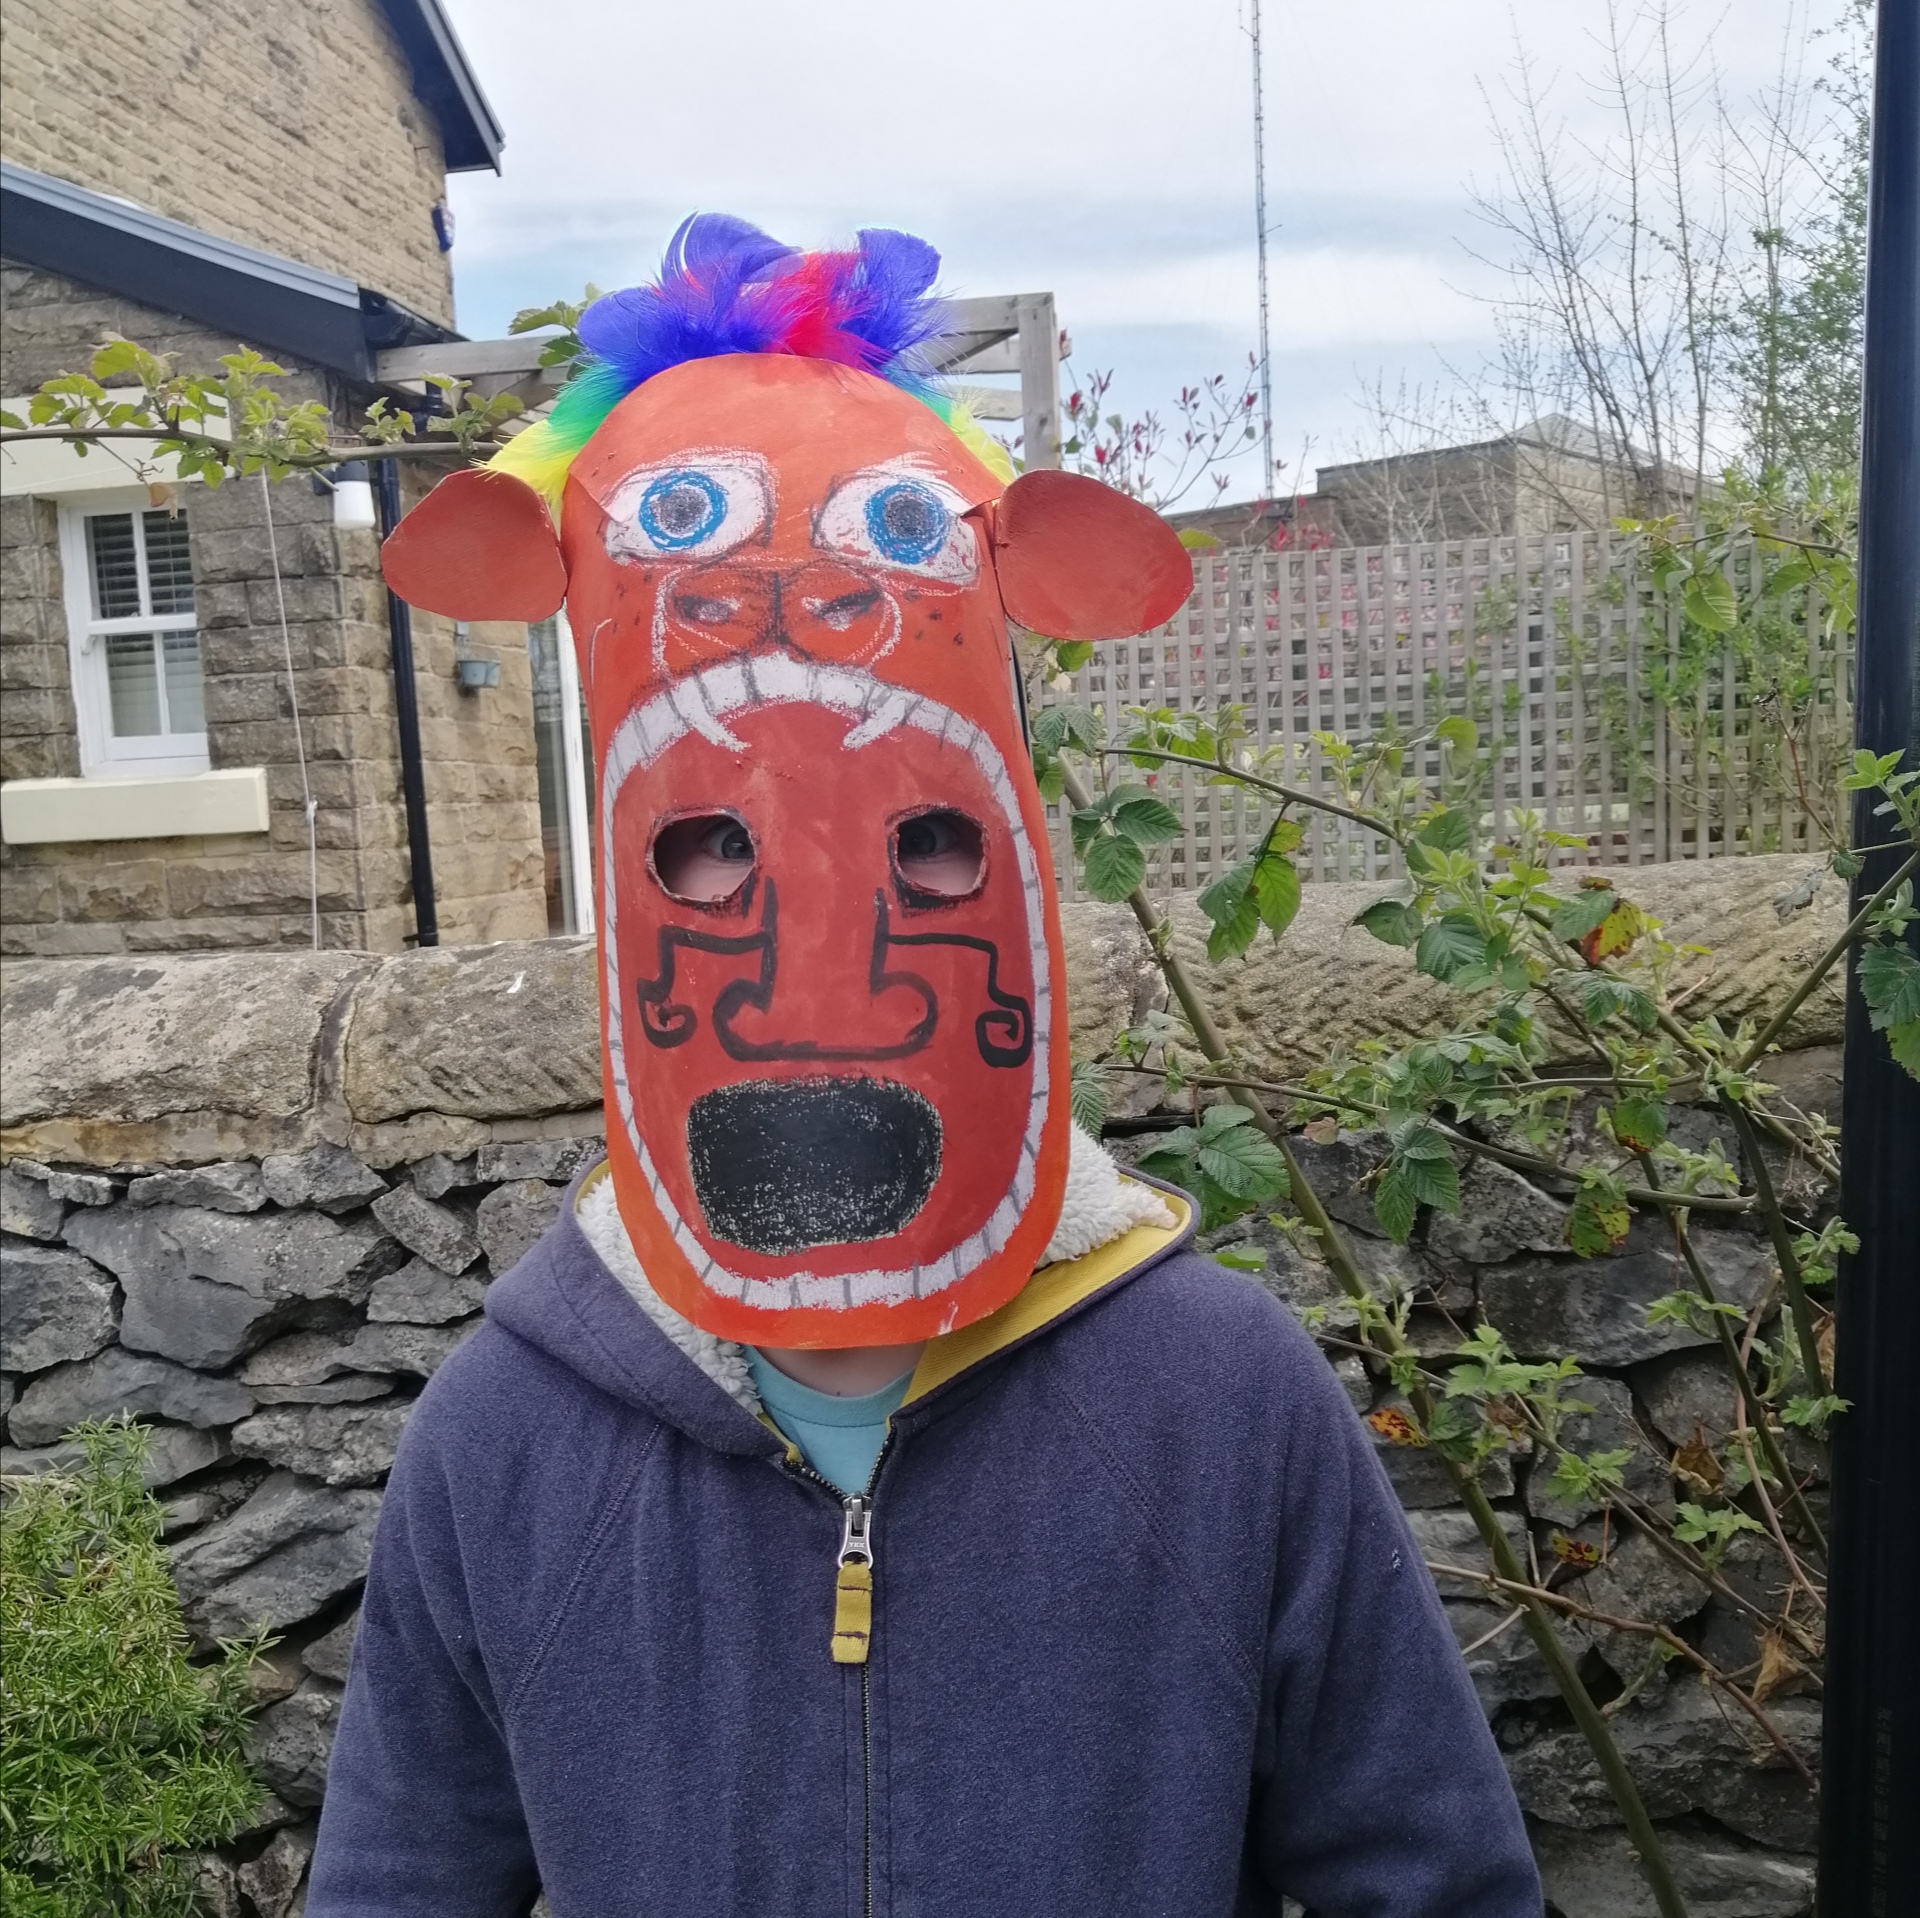
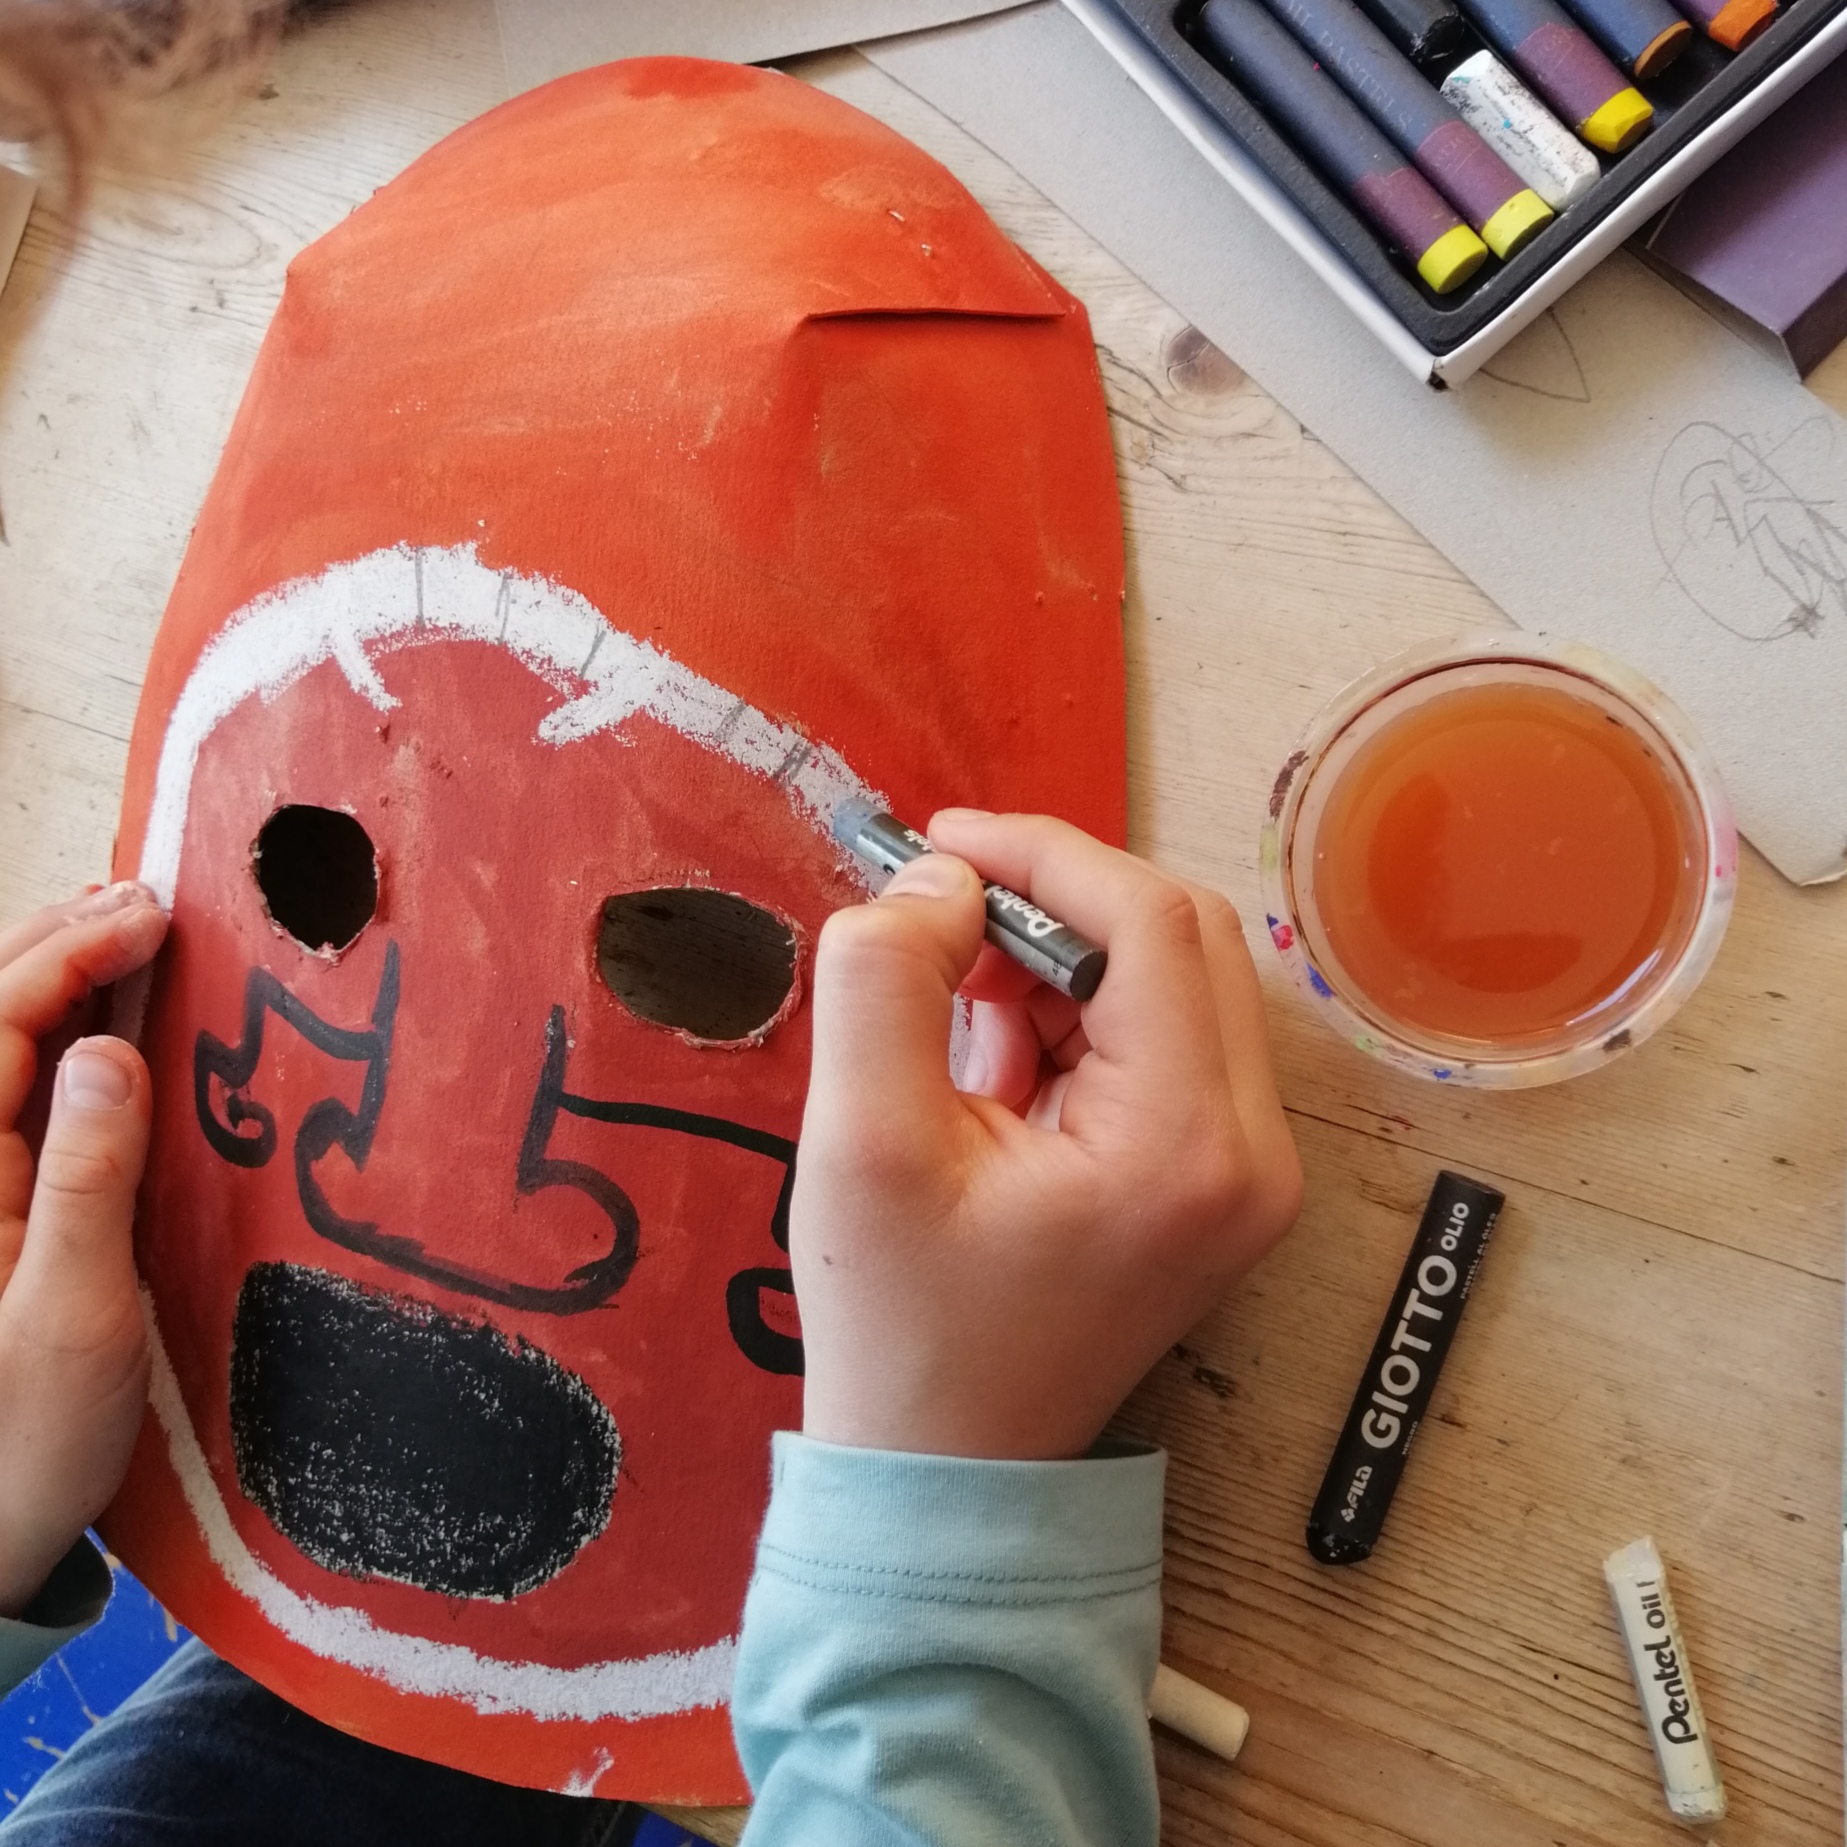
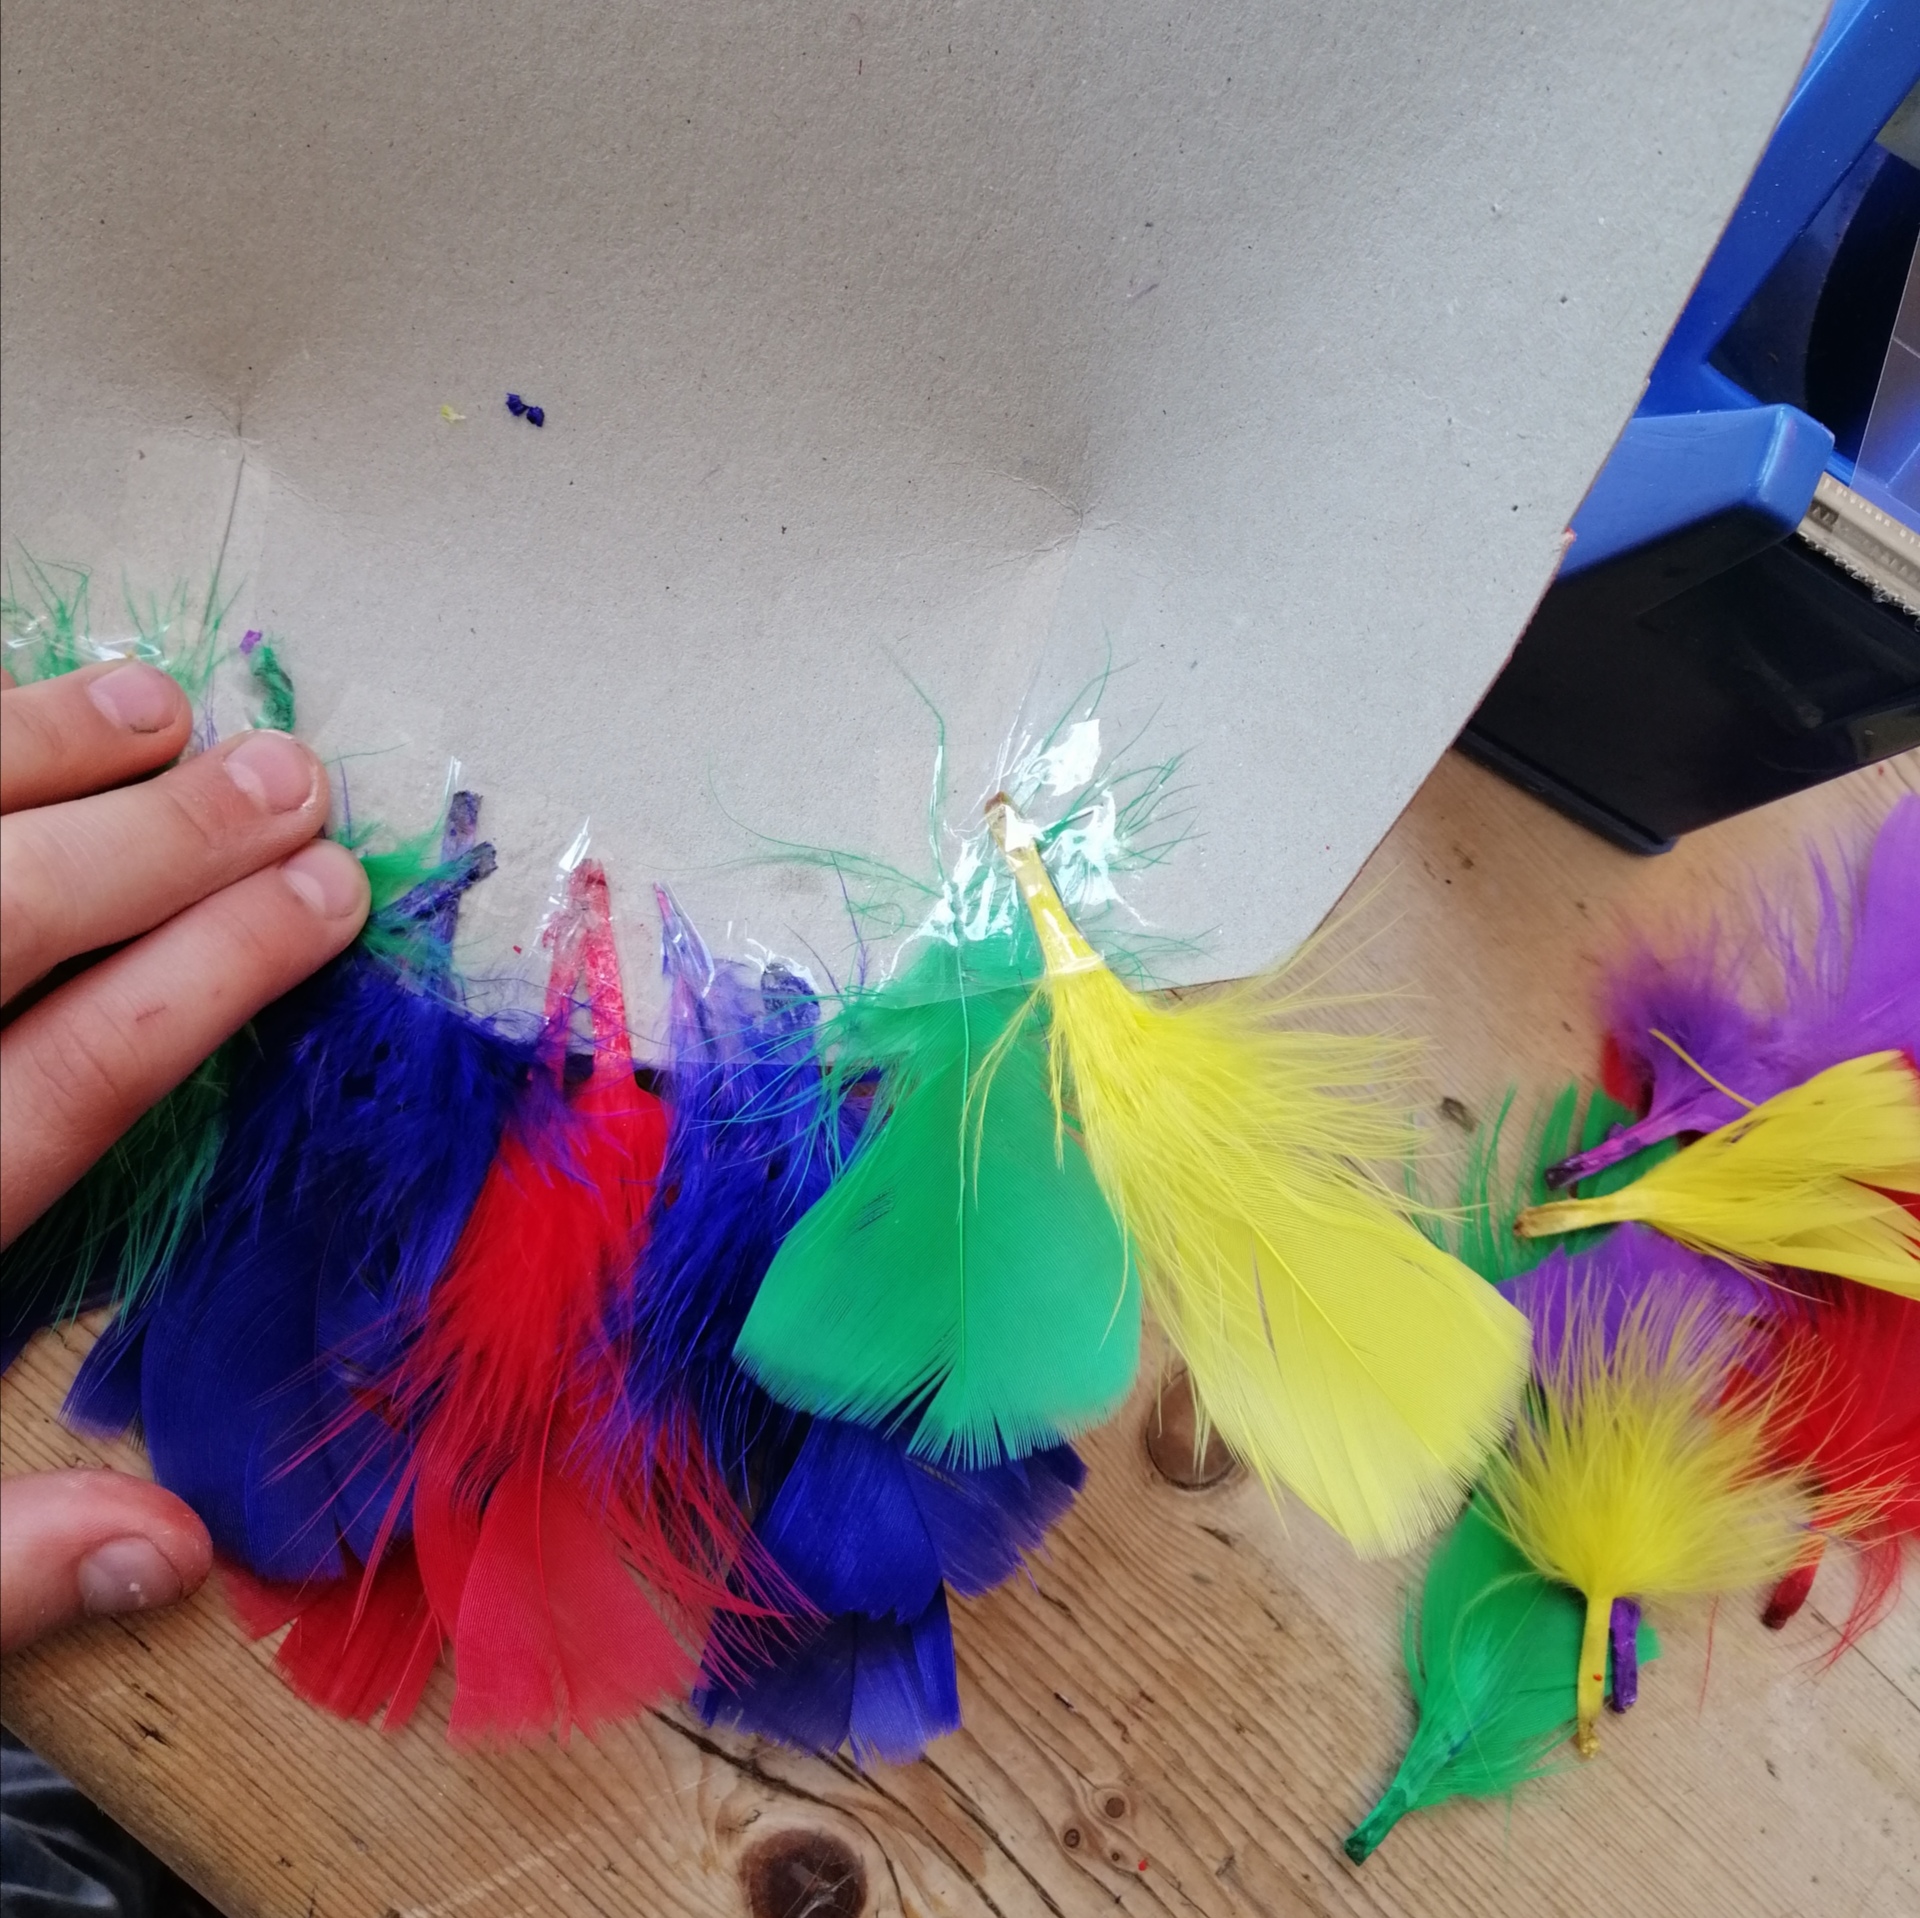
Wilf’s wanted his mask to be more three dimensional so we made slits at the top corners and folded them in securing the card with a staple. He then used his design to redraw the features and then he used paint to colour his mask. He then added coloured feathers to the top of the mask and we secured them with tape.
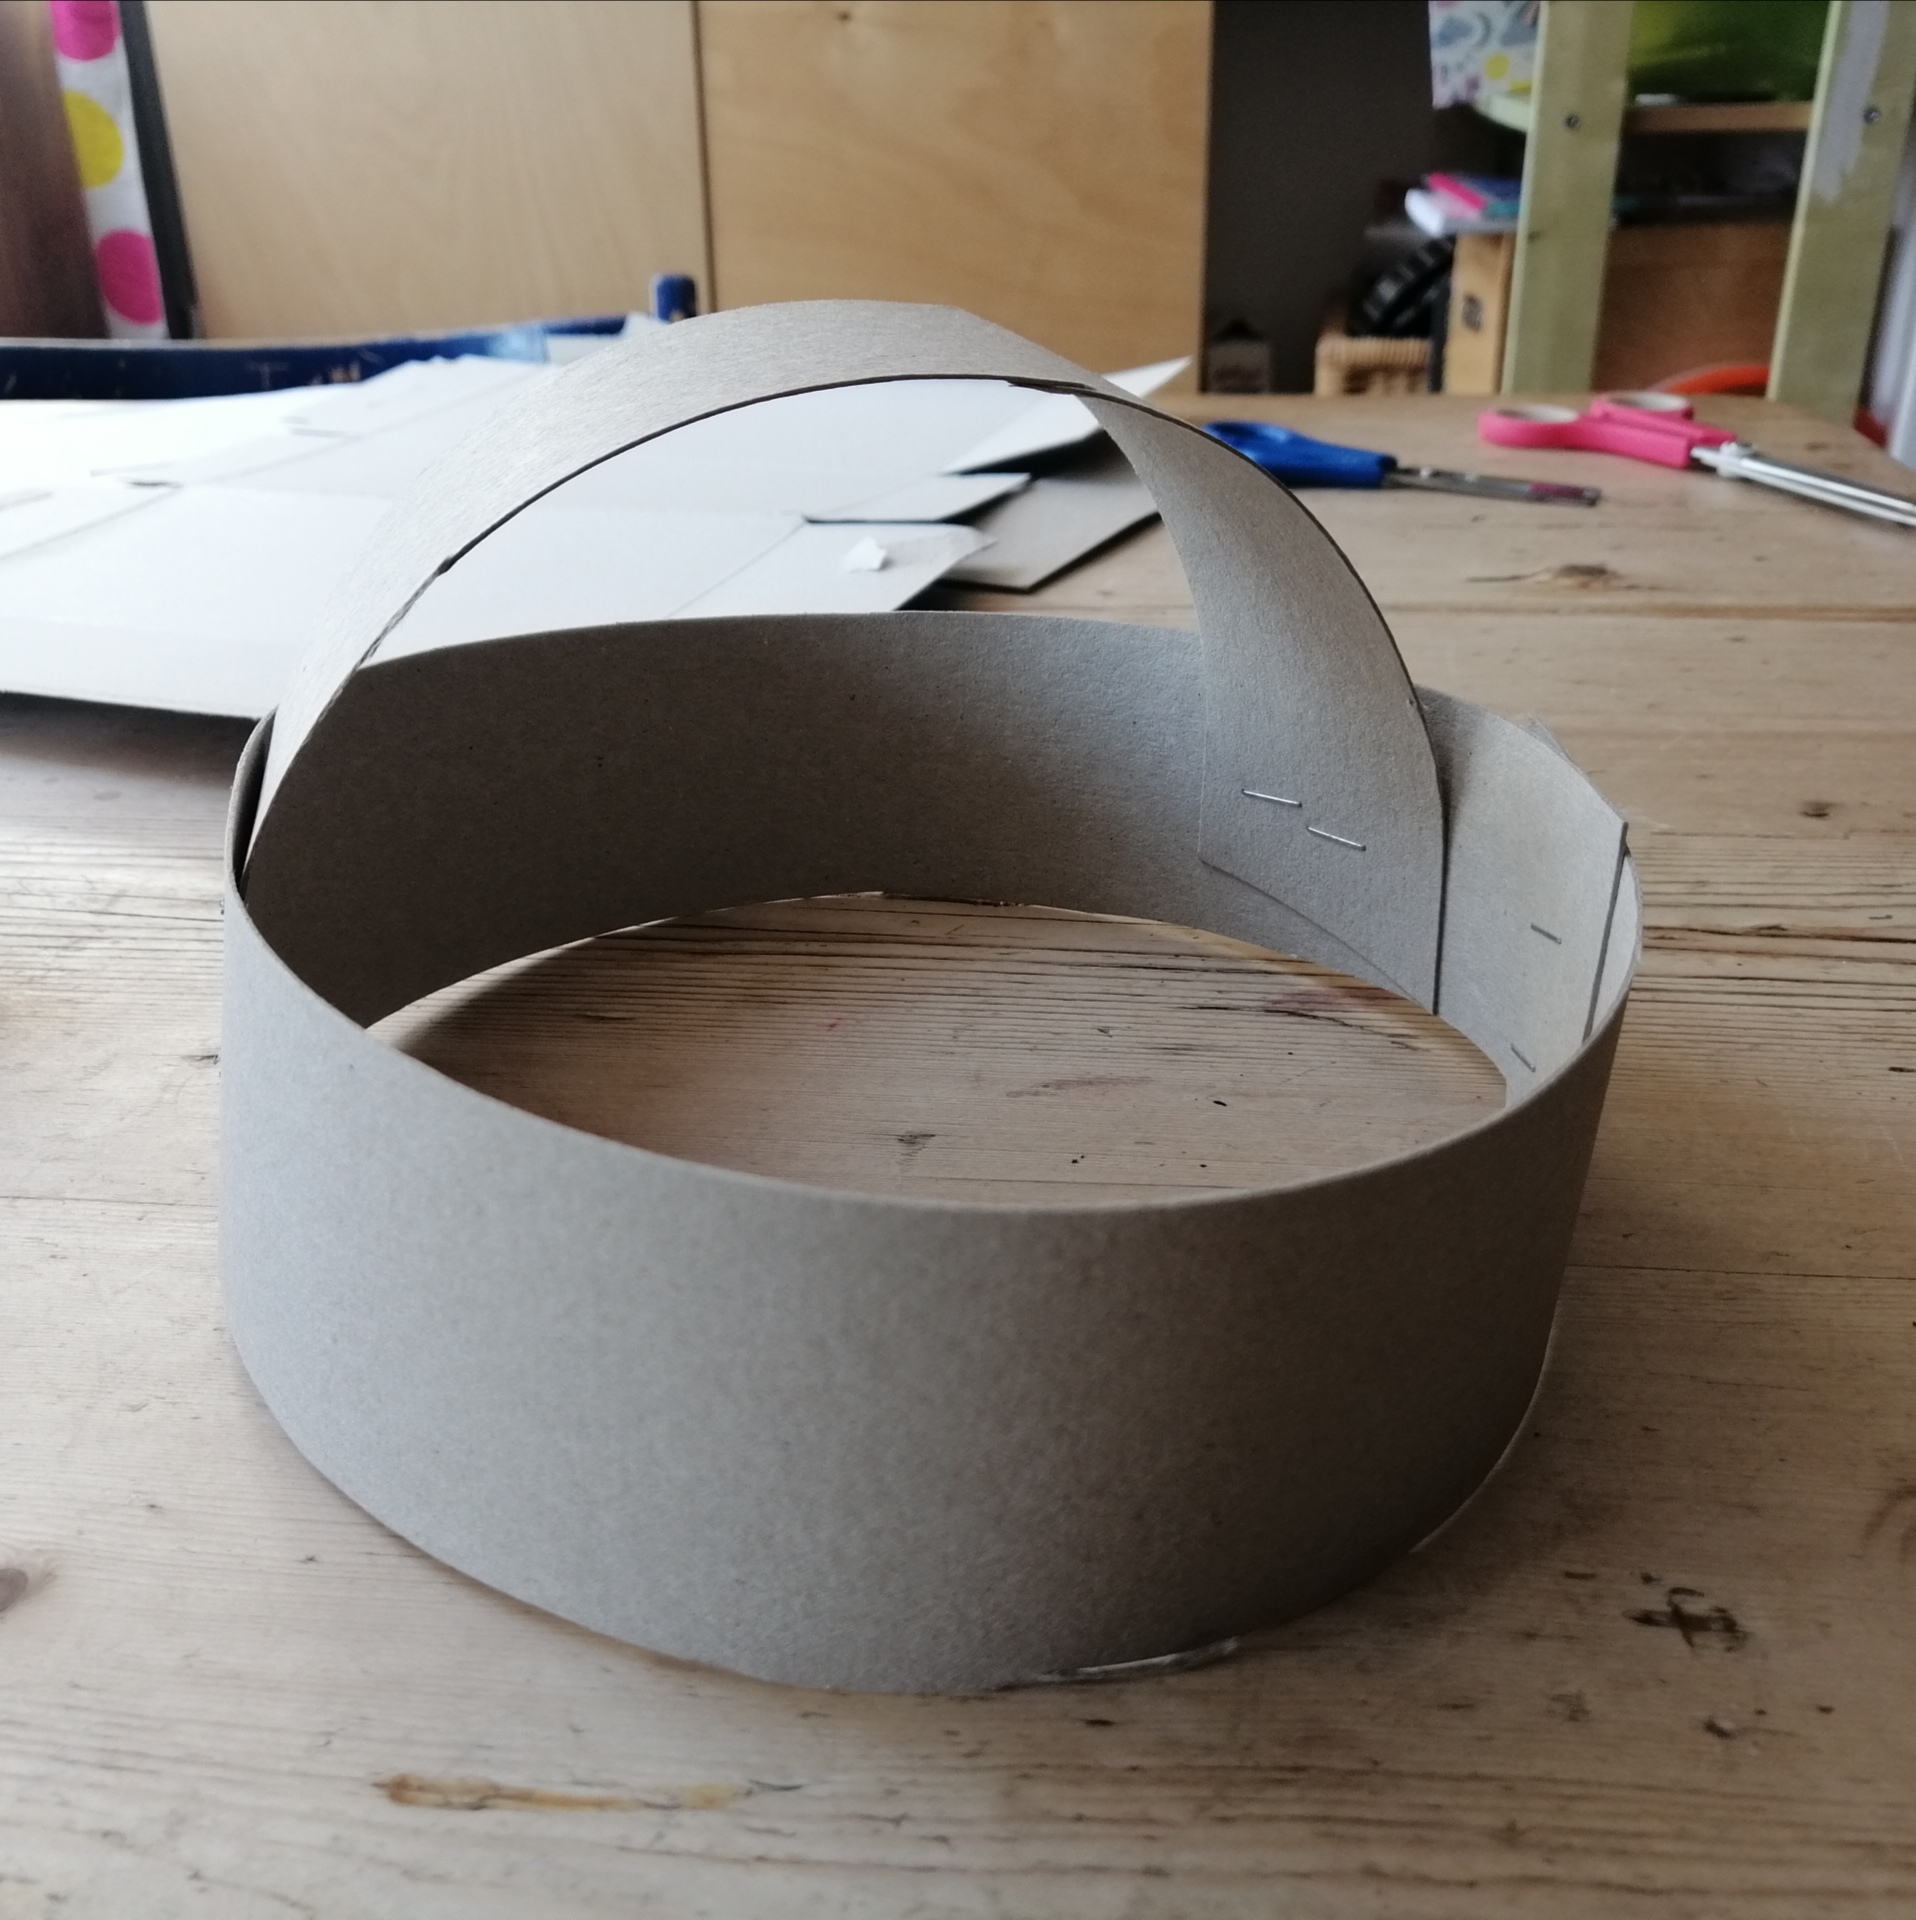
To fit the mask to the face I used a cardboard headband. You cut strips of cardboard and measure it around the child’s head. Then you put a central band across. This stops the mask from falling down over the eyes and it always seems to work better than elastic as it’s more structural.
I was really proud of their efforts and they were very pleased with the finished results. Hope you have fun making your masks, feel free to share your efforts on our social media pages.